Not Into Technical Jargon? Just Want the Download?
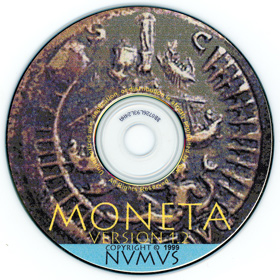 The article below was written as an exhaustive technical guide that covers one approach toward patching long-since abandoned and unsupported software products, using freely available tools. I chose to use Moneta: The Roman Imperial Coin Program for the general tutorial — an obscure application from the 1990s that a friend and several hundred others purchased, but with no way to activate it since the business went defunct many years ago.
The original software required a hardware-based activation key, which is no longer possible to obtain. Further, it lacked 64-bit compatibility so would not even install on modern operating systems. I will remedy all of that and more throughout the guide, but those just looking for the fresh installer with everything patched and working happily you can grab it below.
-
Moneta-Setup.exe (2022 - v2.0.16 Patched - 100% Clean per VirusTotal.com)
NOTE: The patched version is based on the final released edition, v2.0.15a, and has been altered to work on modern operating systems and without need for activation.
Introduction and Objective
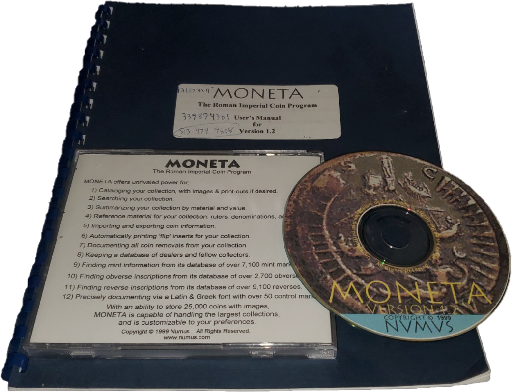 A friend approached me with an unusual technical challenge. Decades ago, he had purchased a highly niche software application for indexing and printing flip cards for ancient Roman coin collections. The software was called Moneta: The Roman Imperial Coin Program and was developed by George Thomas Schroer ("Tom") under the business entity Numus. It was sold through Schroer's long-since removed website for $95.95.
According to an interview with Tom in the October 2003 issue of The Celator, he had approximately 300 sales of the software after distributing 1,000 demo disks to collectors and organizations over more than four years. The demo supplied on disks (and later via download from his website) was fully featured but launch-limited. A free user could only run the program 11 times before it would require activation.
Tom's anti-piracy approach to software validation was two-fold: On launch, the program would generate a unique authorization code based on the computer's digital fingerprint. The user would relay this code to Tom after purchasing the software, to receive a custom serial number for unlocking the application based on a secret algorithm. If the user ever changed computers or reinstalled Windows, the serial number provided would no longer work and a new one would need to be requested, which Tom would provide free of charge to existing customers. This approach was similar in style to hardware dongles and other device-locked serial numbers in the 1990s.
Unfortunately, the software eventually vanished into the void, as did any hopes of future activation. The website became stagnant in 2009 and Tom's Ohio-based business trade name was canceled in 2012. There have been comments on message boards suggesting Tom passed away in the mid-2010s, but this could also be the result of a confused similar name from the area or his father who was also George Schroer. (As of 2021, Tom remains the property owner on file for the address he operated as Numus.) Either way, no online activity has existed from Tom in more than a decade.
The guide for the last released version of Moneta (v2.0) stated that the authentication algorithm was on file at the Classical and Medieval Numiscmatic Society and, in the event of business shutdown, the algorithm would be released to the public. However, no such algorithm or key generator was ever released and CMNS has reportedly failed to respond to any inquiries—the CMNS website itself also ceased updates in 2012.
Once Moneta is purchased, simply mail, call, or e-mail Numus giving your validation number and you will be sent your authorization code. The algorithm for calculating the authorization codes is on file with the Classical and Medieval Numismatic Society and will be released to the public in the unlikely event Numus ever ceases business. -Moneta 2.0 User Manual
The license distributed with Moneta was dubbed a "no-nonsense license" and consisted simply of the following text:
NUMUS NO-NONSENSE LICENSE AGREEMENT:
Moneta is copyrighted by Numus and unauthorized use, duplication, or distribution is strictly prohibited by law. All rights reserved.
Moneta may be used by the purchaser and his/her immediate family and thus may be installed for their personal use on any computers under their personal control.
Copies of Moneta may be made for back-up purposes.
With that in mind, many users including my friend have exhausted all avenues in attempts of reactivating their legitimately purchased software, which also makes their original coin databases inaccessible. Moneta was developed more than 21 years ago and has been unsupported by the developer and nonexistent for the better part of a decade. It is by all definitions abandonware.
As both a software engineer and an advocate for historic software preservation, I will now document my personal methodology for analyzing, reverse engineering and patching the software to remove the time trial and numerous authorization prompts—using only free utilities. I will also deal with many other struggles of bringing a 32-bit product developed on Windows 95 back to life on a 64-bit Windows 10 platform. The steps in this process will use Moneta as an example, but the high level concepts can be applied to any abandonware application that needs patching/cracking.
Phase 1: Imaging the Original Media
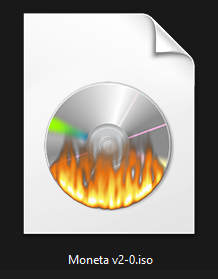 Before beginning any investigative review of software or making modifications to it, I always make a digital image of the original media for safekeeping and for quick reference to the vanilla files.
I'm going into this process blind, with no prior experience using the software. My friend supplied me with the original Moneta v1.2 installation CD-ROM and spiral bound manual. Even though I was able to find a trial version of v1.2 buried in an old archive of the Numus website, it is always better to use the full source material when available, in this case the physically shipped CD-ROM.
MEDIA: There is nothing unusual about the CD. It is a self-burned 600 MB disc with an inkjet-printed label. This was a common approach to independent software production and distribution in the 1990s, typically using a plastic CD labeler like NEATO.
In this scenario, all of the contents of the CD can be selected and copied directly to a local folder using the standard File Explorer. However, a more clean and archival-like approach is to convert the disc into an image, which will also enable us to easily mount the image and install it in virtualized environments.
Create an Image from Disc using ImgBurn
 ImgBurn is a free and lightweight utility for reading and writing discs. It is also available in the excellent Ninite multi-program installer. One of the options within the program is to create an image file from a disc, which will convert the data on the disc to a an optical disc image (ISO). To do so, after installing the program:
- Insert the CD-ROM and launch ImgBurn.
- Select Create Image File from Disc.
- Make sure the CD-ROM drive is selected under Source.
- Click on the Browse icon under Destination, navigate to your preferred storage location and enter an image name.
- Click the large Read/Start button at the bottom of the window to begin conversion.
NOTE: If the image creation is unsuccessful or data seems corrupt or missing, try to adjust the Read Speed to lower values. In the past, I have worked with self-burned CDs that seemed unreadable on a modern drive, but changing the read speed to 4x / 8x slowed them down enough to create a reliable copy.
Moneta v1.2 vs. v2.0
When I started this process, I was using the physical CD that my friend purchased of v1.2. However, around 2004 the developer released v2.0, containing a variety of improvements and bug fixes. During my research, I wrote to several users from a coin collecting forum who had posted about the software several years ago. Several of these users graciously provided the contents of the v2.0 CD-ROM so that I can apply the modifications to the latest and greatest release of Moneta.
As such, I created another disc image (ISO) from the v2.0 base. This is once again easily achievable via ImgBurn by selecting Create Image File from Files/Folders, dragging the contents into the Source box, selecting a Destination (e.g., MONETA_2.ISO), clicking the Build button and entering a Label (e.g., MONETA_2).
Online Updates
The developer offered online updates through July 5, 2009 with version 2.0.15a. The updates were provided as self-extracting ZIP files containing an updated copy of Moneta2.exe and had no other dependencies, provided the base application was already installed from the disc.
The latest archived version obtainable online was version 2.0.12c from July 15, 2007. However, again thanks to other advocates of patching this software I was able to obtain the final 2.0.15a variant, which I will utilize for patching as I go forward. The final update introduced some improvements to the UI on widescreen monitors and brought some of the original file selection dialogs to more modern times, so is a valuable version to work with in our effort of creating a modern redistributable.
Creating "Working" and "Vanilla" Folders
With the original unmodified disc image(s) now safe and secure, I prefer to extract the disc image contents into a respective "Working" and "Vanilla" folder. Initially both of these folders will be identical. But this approach provides a clean way to ensure that any modifications are done only within the "Working" folder, and any problems that arise can be remedied by comparing files or replacing them with the "Vanilla" source. For file and folder comparison I recommend the free utility, WinMerge.
In modern versions of Windows, ISO files can be mounted directly from Windows Explorer. To do so, right-click on the file and select Open With → Windows Explorer. (You may also be able to simply double-click the ISO file to mount it, if another software program hasn't overwritten the default launch behavior). This will open the image as if a CD-ROM has been inserted into a new drive letter. You can then select all of the files, copy them and paste them into the newly created folders. Most extraction utilities such as WinRAR and 7Zip also support ISO extraction in a similar fashion.
After the software is actually installed, it makes sense to create similar folders for the real data and executables that we will be working with.
Phase 2: Assessing the Installer
Most software is distributed using an Installer Package or Setup Wizard. When you insert an application CD or launch "Setup.exe," an intermediary software application launches, which is used to configure the operating system, set installation paths, install any third party dependencies, and extract the contents of the actual application. Some installers may also include license and registration prompts.
There have been many free and commercial installer products used throughout the decades. Common installers from the 1990s through present include Wise, InstallShield, Inno Setup, Microsoft ACME Setup and NDIS. Since these setup programs can use different architectures than the bundled application itself, an initial roadblock potentially exists from installer-related conflict itself.
Determining the Type of Installer
There are many different ways to discover what installer product the software was packaged with, sometimes simply by launching the installer and looking for any branding clues or reviewing the file structure and metadata. Some installer executables can also be opened directly within 7Zip or WinRAR. In the case of Moneta, the default installer executable refuses to run on any 64-bit operating system. This will be the first task that needs overcoming in order to unearth the application itself.


In reviewing the default setup files, I notice it contains _ISDEL.EXE and _INST32I.EX_, both indicators of an InstallShield package. Another helpful indicator of install package can sometimes be discovered through the Setup.exe property details. After right-clicking on the executable and selecting Properties → Details I can see that the setup program is InstallShield 3.00.111.0 from 1999.
This explains the first problem. The 3.x version of InstallShield attempts to launch a Windows 3.1 (16-bit) compatible loader at first. This was a logical implementation in the 1990s and was fully supported by 32-bit operating systems. But the new standard of 64-bit operating systems provide no support for 16-bit programs. Even though the Moneta software itself was built for 32-bit operating systems, the system blocks installation of it due to the 16-bit Setup.exe that launches initially.
In the case of InstallShield, the 16-bit executable actually houses a 32-bit installer within its bundle. On supported machines, launching Setup.exe will extract a number of installation files to the system's temporary directory, including the actual 32-bit installer program that is compatible with 64-bit systems (named _INS0432._MP but renamable to Setup.exe). To alleviate the tedium of having to install a 32-bit virtual machine just to extract this file from the installer, it is also available via ToastyTech.com. The 32-bit executable can be copied to the install directory and launched in place of the original, to trigger the installation wizard on a 64-bit machine (it may take several minutes to launch).

Phase 3: Auditing the Program Files and System Changes
Before actually installing the software, it is best to compile a file and registry audit to track precisely what files get installed to which directory and what system changes occur. This will prove invaluable later on when reconstructing a modern installer, as well as analyzing all of the software's installed components and third party requirements.
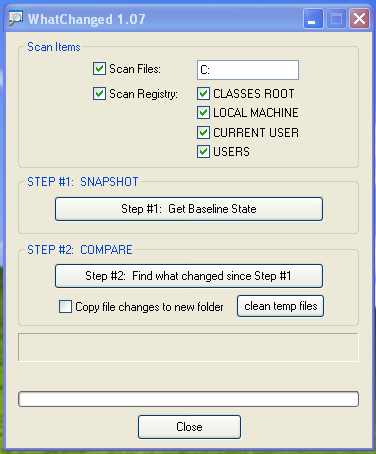 There are several third party extraction tools floating around for InstallShield, but they are largely built for the more modern version 5.x. These tools may also miss certain external packages that installers can trigger. Some setup utilities include command-line options to output a verbose log of changes, but I had no success attempting such with this variant of InstallShield 3.x. Instead, the most direct way to assess the changes to the operating system and hard drive contents from an installed program is to compare a before-and-after snapshot of the system.
Many software programs exist to facilitate in tracking changes to a system. Since our only intent is to see what (if any) registry keys are manipulated and what files get extracted to which directories, we can use the simple freeware utility, WhatChanged. With the program downloaded, it can be launched and configured to scan files on the C: (the base drive the software will install to) as well as all registry keys.
After checking the appropriate options, clicking "Step #1: Get Baseline State" will scan the system and produce various log files that document the current state of the system. It is beneficial to run this tool on as clean of a system as possible to reduce the amount of auditing required. To make things fast and easy, I used a vanilla install of Windows XP on VirtualBox which has a much smaller footprint than modern operating systems, especially ones that have been heavily used.
 Once the baseline logs finished generating, I launched the Moneta installation setup and walked through the setup process using all default options. After it finished, I returned to WhatChanged and hit "Step #2: Find what changed since Step #1." This again scanned the system and compared any differences from the previous audit.
Documenting the Impacted Files
In the end, 189 new/modified files were noted in the output log as part of the installation, as well as 223 new/modified registry keys. There's a decent chance that some of these changes are false flags and irrelevant material associated with the installer, temporary files and so forth instead of the core application, so need to be reviewed for relevance.
After filtering out innocuous files that were unrelated to the actual software, I determined the following files were copied as required to run the application:
- Borland Database Engine (BDE) [25 Files] — A popular client-side database management system from the 1990s. It allows simple database management from various sources and was especially common for Delphi applications and the Paradox database engine. Default Installation Directory: C:\Program Files\Common Files\Borland Shared\BDE\
- Moneta Core Application [153 Files] — The application itself, including database files, executables, readme file, images and other assets. Default Installation Directory: C:\Program Files\Numus\Moneta2\ — Database Installation Directory: C:\Program Files\Numus\Moneta2\Monetadb\ [The default database directory as of 2.0.12 is C:\users\name\AppData\Local\Numus\Moneta2\Monetadb to comply with Windows Vista+ requirements.]
- System Fonts [5 Files] — As part of the software package, several custom fonts were developed by Tom to display special glyphs and characters as part of the Roman lineage. Several others were included for the sake of completeness, although they also are default fonts in Windows. The full list of fonts bundled with the product include: Arial [ARIAL.TTF], Arial Bold [ARIALBD.TTF], Numus Moneta [NUMUM___.TTF], Zurich Condensed BT [ZURCH.TTF] and Zurich Bold Condensed BT [ZURCHBC.TTF].
As far as the Registry changes, most of the detected entries were irrelevant and unrelated to the application itself. Several entries related to the installer. That said, 88 entries were added to HKEY_LOCAL_MACHINE\SOFTWARE\Borland\ to manage the installed database engine, and 26 items were added to HKEY_LOCAL_MACHINE\SOFTWARE\Microsoft\Windows\CurrentVersion\SharedDlls\ to allow the BDE dynamic link libraries to be shared across software (as needed for Moneta). All of these registry changes are completed as part of the Borland installer, included within the Moneta base. The installed fonts were also added to the SharedDlls key, but as long as they are installed to C:\Windows\Fonts\ (as done via the installer) they should be accessible from any software application, regardless.
There are several folders of files on the Moneta CD that are not part of the actual installation. These are non-essential to the program's usage but include:
- Manual — The full written manual and quick-start guide in both DOC and PDF format.
- Utilities — Various DLLs, in particular relating to the database files and repair tools.
- Version Conversion — A program to assist with importing original Moneta v1 files to v2.
Phase 4: Probing the Underlying Software Architecture
With the software now installed and an inventory of affected files indexed successfully, we can get to the heart of the project. Many different development environments and architectures are used to develop and support software, so determining which one Moneta was developed with is our first step toward reverse engineering it.
My go to freeware to capture a high level overview of the underlying foundation for many executables is PEiD. This small portable tool, along with a separate signature database file, is able to detect over 470 platforms that an executable may be based on. After feeding the Moneta2.exe executable into it, I can see immediately that it was developed with Borland Delphi 6.0 - 7.0 using the Win32 GUI. [The original v1.2 version, Moneta.exe, was built with Borland Delphi 4.0 - 5.0.] Through PEiD, you can also peak at the hex code and Win32 components, but there are more advanced tools for wading into those weeds.
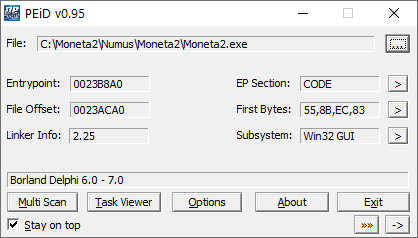
The other central component of Moneta, as we observed from review of the installation package, is the database infrastructure. We already gathered that it uses some variant of Borland Database Engine (BDE). A quick glance into the MonetaDB directory reveals a variety of files that align with the Paradox relational database system (*.PX files). To get the software to work on modern hardware, we will need to ensure we can bundle a version of Borland Database Engine that is compatible with Windows 10 and 64-bit architectures.
NOTE: Moneta v1.2 utilized unencrypted database tables powered by Paradox 5. With the upgrade to Moneta 2.0, the developer migrated to an encrypted version of Paradox 5 using the Delphi plugin PX3P.
Phase 5: Determining the License Validation Method
On modern 64-bit operating systems, even launching the software as-is can be a challenge. It tends to hang and consume 100% CPU. For now I'll do some of the investigative work in XP to make it easier. When Moneta is launched, a splash screen appears followed by a series of alerts informing you how many times you may start the application before it needs to be registered, including instructions on how to register and a textbox for entering your registration key, if you have one.

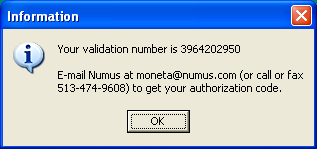
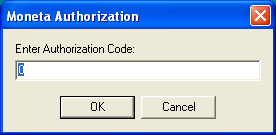
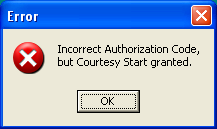

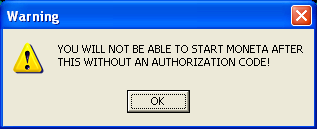
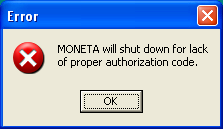
Each subsequent start of the application decreases the count by one. This indicates that the launch count is being recorded to some external file then re-read upon launch. As a quick fix, we could attempt to determine which file retains this value (e.g., by using the previously mentioned WhatChanged app to compare file modifications, or WinMerge to compare binary differences between two instances). Once known, we could manually alter it to a larger value, or prepare a script that rewrites it with an older version each time it is changed. But that's a sloppy approach, though I will cover it anyway for the benefit of other potential apps that may be easiest to solve in this manner.
Quick Fix: Extending Trial Limit Indefinitely
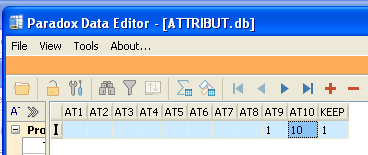 After analysis, I determined that the launch countdown decrement is stored in the AT10 column of the ATTRIBUT.db paradox database file. This file is also used to store some generic attributes within the software.
An inherit security hole in many older versions of Paradox from (at least version 4.x through 7.x) is that, even if the databases are password-protected as ATTRIBUT.db was, there exists several backdoor passwords that can immediately unlock all of them. Those passwords are widely known and circulated online. Many third party tools to edit Paradox database files incorporate this password circumvention capability automatically.
With Moneta 1.2, updating the trial count to any arbitrary value such as 99999 is as simple as opening ATTRIBUT.db in a Paradox-compatible editor, such as the free Paradox Data Editor, and altering the AT10 column value. Even though this file is password-protected, one of the catch-all passphrases or third party software is enough to get around it. After resaving the file, the prompt on open now looked like:

In Moneta 2.0, each database table is double-encrypted using PX3P. This means that although we can still open up the database files successfully, the actual fields are output as garbage data and split in cryptic ways, based on a secret encryption key the developer specified during development. In this case, the fastest fix would be to make a copy of the file and then restore it (either manually after the trial limit occurred or using a script to monitor and replace it on change).
However, in patching this program I would prefer to circumvent the prompts and alerts outright. This is a much cleaner and future-proof approach than monitoring and modifying files just to lazily reset the time limit. For that, I'll need to dive deeper into the underlying memory data of the executable and see if I can trace exactly how the application checks for a valid license and either boots the user or grants access.
Better Fix: Suppressing the Prompts Outright
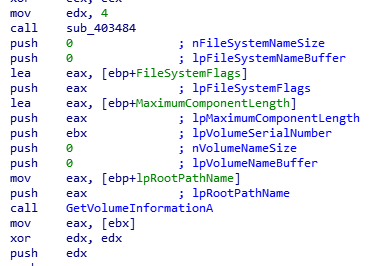 Every application can be disassembled or memory-edited down to its barest form of assembler code and bytes, typically represented as hex values (00 through FF). We can use specialized utilities to open executables and review the lowest level instructions used to carry out its functionality, within each block of memory that it occupies. Such applications are often generalized as "hex editors" or "assembly editors."
The goal is to pinpoint exactly where in memory the prompts are occurring when the application launches, and then trace how to rewrite those areas of memory to trigger the "access granted" operation even if they have not entered a valid code.
In the 1980s, computers were largely 8-bit with much simpler CPUs and machine instruction. Over time the architectures have evolved to the point where 32-bit and now 64-bit processors have become the norm, and trying to decipher compiled executables can easily feel overwhelming even for a highly experienced programmer. However, with the help of some excellent free disassembler applications and context clues already determined, we should be able to narrow down the focus area in a hurry. A logical approach to this will be to trace the prompts backwards to the earliest entry point, then see if we can reroute code execution to mimic the registered product instead.
The next section is going to get a bit deep and sophisticated in jargon of memory editing. Reader discretion is advised.
Phase 6: Patching the Executable
In sticking to the "freeware only" mindset, the most comprehensive disassembler and analysis utility offered completely free for non-commercial use is IDA 7.6 (Interactive Disassembler). For a long time only v5 was available for free, but with v7 both 32-bit and 64-bit executables can be analyzed and disassembled and it can run on any modern operating system with many added features. To get the most from the utility, I recommend running it on a modern Windows 10 64-bit operating system.
The IDA suite includes a huge number of disassembly-based tools and has a long history of feature evolution, which can make it a daunting prospect at first glance. But once you work with it for awhile most of the popular features and views become second nature. To begin, I used the Quick Start wizard and selected the Moneta2.exe binary file from the installed Moneta directory—again it is advised to make a complete copy of the installed program folder before beginning, or at least a copy of the vanilla executable. The default load options are usually fine ("Portable Executable" with both "Analysis" options enabled, and optionally "Load Resources" checked, although there are more dedicated applications for that). The first time the project loads the executable will be analyzed, which can take several minutes.
Several views will be available after the analysis is complete. The most useful to start with is IDA (Disassembly) View, which generates human readable assembly code. This code is typically shielded by development environments and high level languages like C++, Delphi and C#, but they all eventually boil down to low level assembler code themselves. This view allows us to glimpse the executable's makeup at its most fundamental level. At any time, you can open the IDA View by pressing CTRL + 1 to open Quick View and then selecting Disassembly.
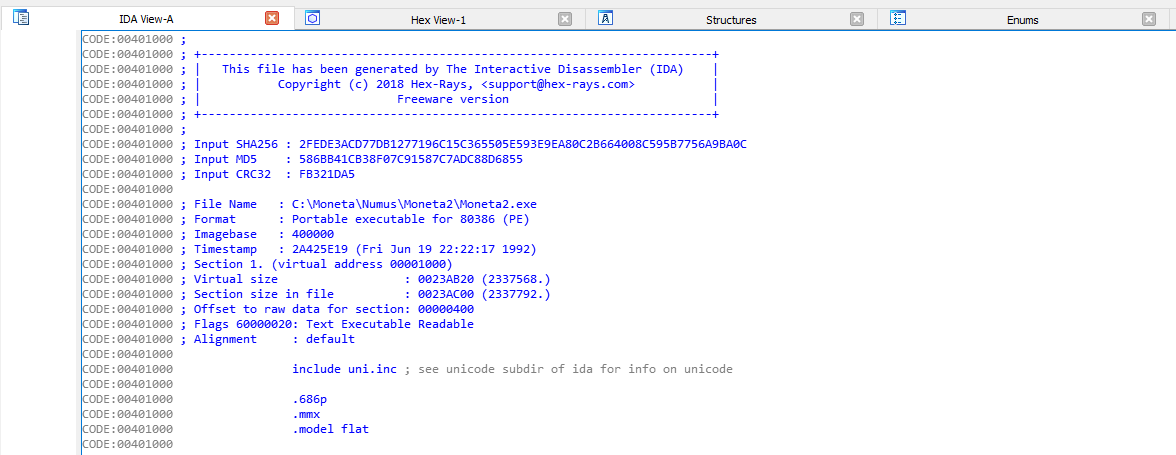
There are a couple other views of equal benefit, especially Graph View. By using Graph View, an interactive map of the executable is generated that visually illustrates the hierarchy of how routines within the executable correlate to one another. The assembler/graph view can also be synchronized with the Hex View, which are the actual bytes of memory that can be patched when we find the necessary region.
So where does one begin in attempts of deciphering tens of thousands of lines of disassembled code? The alerts that appear when the application launches can serve as a convenient way to jumpstart our search. The text within those boxes should be easily searchable as a Text String to pinpoint where in the assembly the dialog boxes are generated, as well as what triggers them to appear. Extrapolating the text from the boxes, we can use any of the following phrases as part of our clues (notice I omit any variables from the mix and include only static text).
- You can only start MONETA
- More times without an authorization code.
- once more without an authorization code.
- Your validation number is
- Enter Authorization Code
- Courtesy Start granted
- YOU WILL NOT BE ABLE TO START MONETA
- MONETA will shut down for lack of proper authorization code.
From within IDA, I select Search → Text (ALT + T) to open the text search. This is a slow operation compared to searching directly for labels or jump locations, but will give us a solid baseline to continue. For the String field I enter: "You can only start MONETA" and then check the option "Find All Occurrences" and click OK.


This search found four results including a function named sub_694514 (auto-generated name by IDA and may vary depending on executable and preferences). Double-clicking the two matches that do not have a function name will take us to the section of the assembly code view where these and related dialog strings are defined as raw byte data. Notice the uniquely generated identifiers in the CODE column to the left of the text byte definitions (.db), with some important IDs including:
- aYouCanOnlyStar — Label that appears when a courtesy launch has been granted.
- aYouWillNotBeAb — Label that appears for final courtesy launch.
- aYourValidation — Generated validation number that is to be conveyed to Numus.
- aEnterAuthoriza — Label that appears for entering the authorization code, from Numus.
- aAuthorizationC — Label that appears if the authorization code has validated successfully.
- aIncourtAutho — Label that appears if the authorization code has failed to validate.
- aMonetaWillShut — Label that appears when the trial has expired and no valid authorization code exists.
These code reference labels are very important in order to quickly jump to relevant sections of the code, and also make it easy to locate related functions that utilize them. Cross references to any one of these labels can be determined by clicking to highlight them, then pressing CTRL + X (or via the right-click context menu). From the menu, you can then click on any of the reference matches to instantly jump to that function in Graph View.
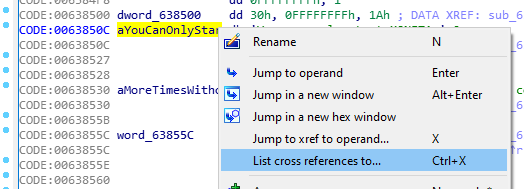
In the original matches from our search, double-clicking either of the matches that contain a Function name will likewise take you to either the Assembly/Text View or Graph View with that routine highlighted. Graph View Makes it drastically easier to trace one function to another and see how the various assembly calls correlate. Depending on the executable being disassembled, the assembly language variant may be x86 (16-32 bit) or x64 (64-bit). In the case of Moneta, the disassembled code is x86 since it is a 32-bit architecture. If you are taken to the text view, you can right-click the text and select Graph View to switchover, and vice versa.
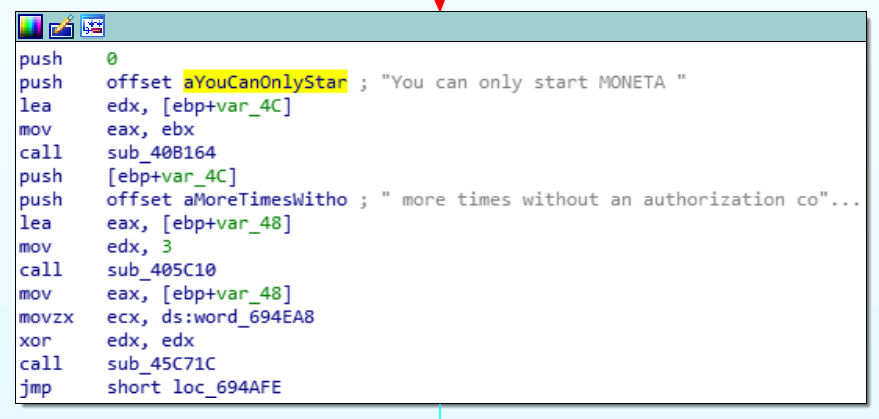
In the routines, the JMP, JP, JZ, JNZ, CALL and RETN are of most interest as they represent redirection to other routines similar to a conditional GOTO or GOSUB in BASIC programming. The lines of code can be selected and analyzed via the context menu just as it can in text view. To better visualize the flow of the program immediately prior to and after this courtesy prompt appears, we can pan around the view by left-clicking and dragging, or zoom in and out using CTRL + Mousewheel. The 10,000 foot overview of this cluster of functions looks something like this (shaded box is the function that references aYouCanOnlyStar):

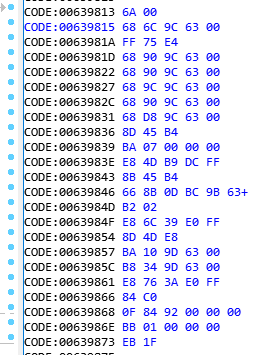 To better understand the memory layout and opcode (byte codes that correspond to assembly instruction) I like to head to Options → General → Disassembly → Display Disassembly Line Parts and enable Line Prefixes (Non-Graph) as well as enter 6 under Number of Opcode Bytes (non-graph). This isn't particularly necessary in this case but is very useful if using an external hex editor such as HxD Hex Editor, XVI32 or Hexed.it, where knowing the memory location and target opcodes will be necessary.
Glancing at the hierarchy in relation to the splash screen promoting and license check, we can begin to make sense of its operations. In general, the application flows from the top-most function to the bottom, but in between will branch off in many directions, loop back to other functions, and otherwise transform as it reads and writes data.
We can immediately sense that the long row of 25 code blocks in the middle make up the hardware license number that then gets displayed to the unregistered user. The output from these blocks all filter into the same function that makes use of the FileAPI of Win32 to generate a unique number based on various hardware attributes, such as the installed drive's serial number, size and type of file system. This explains why new keys are necessary whenever the hardware changes.

 In determining the best place to alter the start state of the application, it makes most sense to begin above the serial generation if at all possible. Moving toward the top of the hierarchy, it was easy to see the root conditional code block that would send the user all the way toward the bottom of the hierarchy (skipping all prompts and licensing mess) if they were a registered user, or otherwise filtered them through the usual prompts and validation prompts.
To better track the flow of the program, we can use IDA's excellent built-in debugger. I highlighted the middle line in the root conditional above, then pressed F2 to set a breakpoint. Then hit F9 to start the debug process. This launches the actual executable but attaches it to the IDA debugger, and will stop the code execution when it reaches the breakpoint. In this way, we can also dynamically alter memory in lines not yet executed to evaluate the effect without committing to the change. While at a breakpoint, we can use F8 to step to the next assembler line, or F7 to drill down into whatever function call is being referenced. For this use case, stepping over to the next assembler line (F8) is sufficient.
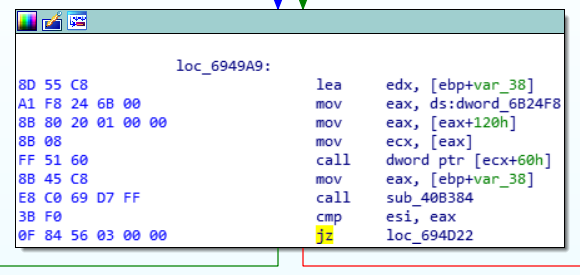
When the last line of a code block is reached in step-through debug mode, such as "jnz loc_694D22" in this conditional block, the next route of execution will flash in the view to illustrate what the next routine will be based on the data that has been compared. Since I am not a registered user in Moneta, the application will send me down the red path and through the slew of license generation and prompting process. The magic happens in the "cmp ds:dword_6B250C, 0" line. This compares the value of a DWORD data segment set in the prior code blocks with 0, and if the result is not zero (jnz) it will trigger the registered user jump and skip past all the registration stuff to continue loading the program. Otherwise it continues execution to the next block, which begins the license and prompting.
![]() We don't need to understand the intricate details of what is being compared, just that if a value exists in dword_6B250C then the user is registered and if not, the user is unregistered. Using this understanding, we can consider simply inversing the jump instruction so that it will jump if zero. This can be done by swapping jnz (opcode 0F 85...) with jz (opcode 0F 84...) This can be done right from our debug session by first restarting the debugger (CTRL + F2, then F9) and then right-clicking the code and selecting Synchronize With → Hex View-1. Now when we left-click the "jzn" line below the breakpoint, the Hex View will automatically select the byte code for the given opcode.
We don't need to understand the intricate details of what is being compared, just that if a value exists in dword_6B250C then the user is registered and if not, the user is unregistered. Using this understanding, we can consider simply inversing the jump instruction so that it will jump if zero. This can be done by swapping jnz (opcode 0F 85...) with jz (opcode 0F 84...) This can be done right from our debug session by first restarting the debugger (CTRL + F2, then F9) and then right-clicking the code and selecting Synchronize With → Hex View-1. Now when we left-click the "jzn" line below the breakpoint, the Hex View will automatically select the byte code for the given opcode.

With the debugger running and Graph View set to synchronize to Hex View-1, the selected line will highlight in the hex view for editing.
Now, we can click into the 85 hex code (so the cursor is to the left of 5), press F2 to enter Edit Mode, and type 4 to change this value to 84. Then, press F2 again to exit edit mode and the previous jnz instruction has now been updated to reflect jz. (If you accidentally try entering a number to change a byte before you are in edit mode and end up changing the hex view, simply press 1 to restore the 1-byte view).
After this change, pressing F8 will take us to the jump operand and this time the left path flashes to indicate it is the active route, meaning we successfully reversed the flow so that unregistered users will now skip past all of the license and prompting. That wasn't so bad! Press F9 to continue the program and verify that it loads successfully. We just circumvented an entire two-step hardware-based authentication process by changing a single byte of the code.
 If all went well, we can patch the original executable with the modified bytes. To do so, make sure the debugger is stopped (CTRL + F2) and that you are in IDA View-A (or Hex View-1) and press CTRL + ALT + P (Edit → Patch Program → Changed Bytes) to view the altered bytes. Depending on which byte(s) you altered, you will see any memory addresses that have been altered including the original and patched values. In this case we altered a single byte from 85 to 84. If all looks correct, you can return to IDA View and select Edit → Patch Program → Apply Patches to Input File. The defaults should encapsulate the entire executable, you can optionally check "Create Backup" if you didn't make one manually and then click OK to save the modified executable. You should see a notice in the output window: Applied 1/1 Patch(es).
As a final test, the Moneta2.exe executable (or desktop shortcut) should be able to launch on its own and skip right past the validation process. Had this not worked out or some other initialization code led to corruption, the next logical spot to reroute the behavior would be the branched function three blocks down from the license generator, using the same sort of approach. There are really a thousand ways to circumvent such activation procedures, but I prefer the easiest that works.
Phase 7: Resource Editing
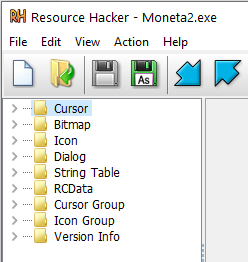 One other aspect that I want to touch on in this guide is the concept of resource editing. Whereas all of the work so far has focused on altering the actual executable to circumvent software-based limitations, another aspect of file modification involves personalizing the application's front-end assets.
Although IDA has the ability to view resources at a low level (provided you checked "Load Resources" when you initially loaded the executable) a much more robust and user-friendly way to review the assets that comprise the executable is through the free utility Resource Hacker. After launching Resource Hacker, you can simply open the executable and all user-modifiable components of it will be organized in the left-hand menu.
Substituting the Icon
Through Resource Hacker's side panel, you can review all assets that make up the UI and optionally replace any of them as desired or add new entries to them. A common use for resource editors is to replace or expand upon the executable's icon, which is especially useful in vintage software that only contain 32x32 icons and look hideous in a modern desktop display.
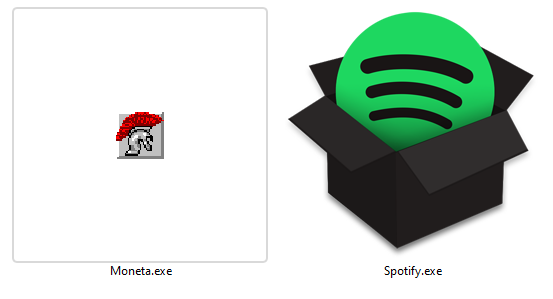
The original Moneta icon is fixed to 32x32. Modern icons, by contrast, contain numerous resolutions all the way up to 256x256. This is the perfect use for a resource editor.

The original Moneta icon depicts a knight helmet with a red plume in all its 32x32 pixel glory. The most faithful way to convert it would be to simply upscale it to 256x256 using the Nearest Neighbor resizing algorithm to retain its pixelated look. However, as an exercise in explaining a more elaborate process and some additional free tools, I will create an alternative high resolution icon using a base from another free resource: Pixabay.com. On Pixabay we can search millions of free images, vectors and videos that carry an open license for commercial and noncommercial use, no attribution required, and modifications allowed. A cursory search for "knight helmet" yielded 43 vectors. Of those, I found this cartoon figure in gold armor by GraphicMama-team to be in similar vein, thematically. Right from the site we are able to download rasterized PNGs or the original vector (in this case in Adobe Illustrator .AI format).
 To better match the format of icons and get closer to the original, we'll need to make some simple color and positioning adjustments. A free vector manipulation program is Inkscape, which is Adobe Illustrator compatible. After opening the AI file in Inkscape, we can double-click on various areas using the Select and Transform Objects tool (S) to drill down to particular portions we wish to alter. I deleted the human and body, leaving just the helmet and plume. To return to the main grouped image, you can double-click a blank area of the canvas.
After that, it was a matter of mirroring the helmet. With it selected, I pressed H to flip it horizontally. Then I drilled into the components again to isolate and group the plume separate from the helmet (CTRL + G) for easy manipulation. I then selected the yellow components of the helmet base and, using the color palette at the bottom, changed them to 50% Gray. For the visor I used 30% Gray and used 70-80% Gray for some of the bordering. I then rotated and re-flipped the plume and positioned it so it was more flush with the helmet, did some skewing and transform adjustments and gave it a more vibrant red base (#D40000). I made some final adjustments including some skewing and thickening of the right-side helmet flap. From there we can save it save it as a more universal .SVG vector (CTRL + SHIFT + S) for future refinements. Then to create a raster PNG version, I press CTRL + A to select the objects, then launch the export dialog via SHIFT + CTRL + E and make sure "Selection" is active and then hit the Export button.
 Before using a service to create the icon package, we could do final adjustments to the exported PNG via a raster editor such as the excellent online utility Photopea.com or any classic free software applications including Krita or Gimp. As part of that I like to resize the dimensions so that they are square (e.g., 256x256 or 1024x1024) and remove any potential vector artifacts that carried over unnecessarily. This would also be the opportunity to add in any non-vector elements to the image, apply special filter effects or similar. In one experiment while working on this, I added a brick-textured background through a raster editor, but then opted to keep it simple. Feeding the PNG into the website ICOConvert.com led to the generation of a .ICO file containing all resolutions from 16x16 to 256x256 that I was able to download and insert back into Resource Hacker to give the original icon a refreshed modern look.
![]()
 But in the spirit of preservation and for purists out there, I'd rather retain the original style icon and add the new one so a user can alter the shortcut to either of them. To do that, I first scaled up the original icon to 256x256 using a "Nearest Neighbor" algorithm to avoid blurring, as mentioned earlier. I then exported and generated a new icon from that source using the same steps above. Within Resource Hacker, you can add as many alternate icon sets as you wish. To get both of these variants added in place of the original, you just have to add them both using "Add an Image or Other Binary Resource" (CTRL + M) and selecting one at a time. With these changes in place, I will display the legacy icon by default (but scaled properly for modern OSes) but any shortcut to the executable can change it to the modern icon via its Properties.

Altering the Typography and Interface
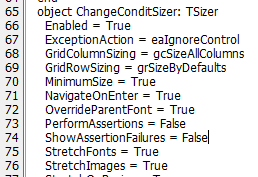 Depending on the type of executable, a variety of other personalization options may also be available from within Resource Hacker. Since Moneta was developed using Delphi, an expandable group appears to the left called RCData. Within this group are the parameters and properties that make up each of the dialog windows and components. By altering the plain text attributes, it becomes possible to change labels, fonts, positioning, scaling, background/foreground colors and other visual attributes.
When I initially brainstormed additional modern enhancements, one feature worth consideration was the scaling plugin. Moneta is designed so that it runs maximized and uses a Delphi plugin to dynamically scale up the fields and inputs to fill the view. Version 1.2 utilized a Delphi plugin known as TSizer and from within Resource Hacker could be toggled per-form and altered in other ways. By setting "Enabled = False" and resaving, the affected form would then display the arrangement as it was originally structured rather than scaling everything to fill higher resolutions. I actually did a total conversion of 1.2 in this style including altering the positioning and placement of certain elements using other attributes within RCData. I determined the scaling was more elegant to leave as-is given the base resolution was otherwise 640x480 and would require squinting at modern resolutions of 1920x1080 or higher. [With version 2.0, the developer used a different scaling plugin and made other enhancements to the UI which somewhat improved its responsiveness and usability on higher resolution displays.]
We can get much more elaborate in modifying the executable's UI by altering additional areas of the RCData section. As a simple example, the initial splash screen that appears when the application loads can be personalized to our liking. By opening up TSPLASHFORM from the RCData menu, we can see all of the properties that make up the loading screen. The introductory text is houses within Memo1: TMemo and can be adjusted by simply altering those details directly within text view (including font size, color and positioning). Likewise, the copyright text and version information appear within their own respective TLabel components, and can be altered by changing the Caption property and other attributes as desired. I replaced the invalid website URL with my own, so that any curious user may stumble upon this blog entry to learn the history behind it, rather than a non-existent domain. I also decided to up the version from 2.0.15a to 2.0.16 to reflect the changes and compatibility enhancements I've patched. When done making updates, you can hit the Compile (F5) then Save (CTRL + S) to rebuild the executable, and next time it launches the changes will be displayed. Care must be taken to not alter things too drastically and to backup and test often, as certain parameters may be tied to code-behind and will crash the executable if changed.
Swapping Embedded Images
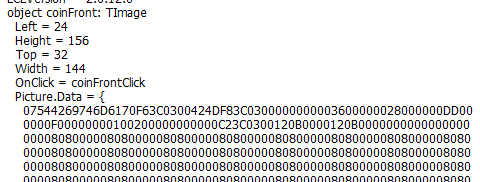
More advanced interface elements can also be manipulated, but it becomes more cumbersome. To replace Delphi-embedded images such as the coins on the splash screen, for instance, the easiest way is to compile a dummy Delphi-compatible executable using the free Lazarus. Lazarus includes Delphi-compatible objects including TImage, which can be loaded with our desired replacement graphic. The image format matters too, in this case raw 32-bit bitmaps are required [if you attempt with the wrong image format, the image won't appear at all in the compiled executable so you know to try a different format]. Once the TImage(s) are populated on the dummy form and the executable compiled, it can be loaded into Resource Hacker and the raw image data copied over to the Moneta executable, overwriting the original image data.
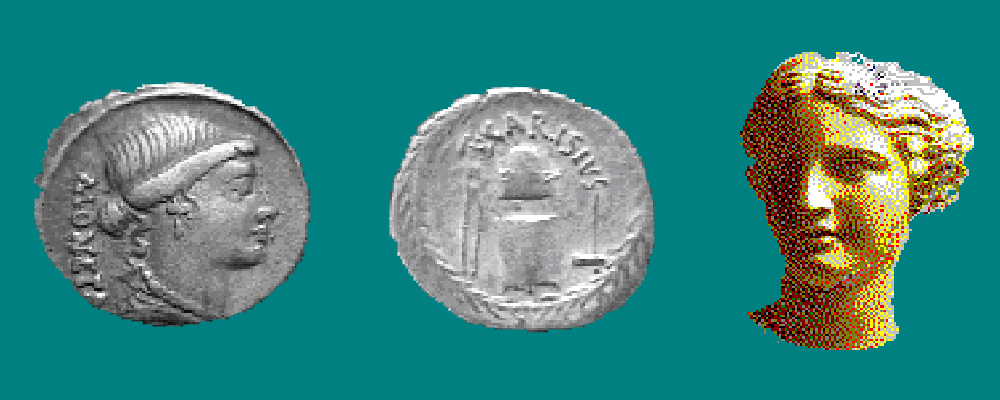
 For the intent of this project and tutorial, I will swap the very crude front/back Moneta coin graphics as well as the Juno figure from the splash screen. As replacements, I sourced a similar matching coin from ForumAncientCoins.com (a site that used to offer dedicated Moneta software discussions and support, and whose members helped me acquire the latest build of the tool to patch). For Juno, I enhanced a public domain statute of the traditional Juno Goddess to marginally resemble the original, except with much greater fidelity and vibrance. Then within Lazarus, I created a new form and added three TImage graphics, naming them accordingly for later identification and selecting the desired bitmap graphic from the Picture parameter.
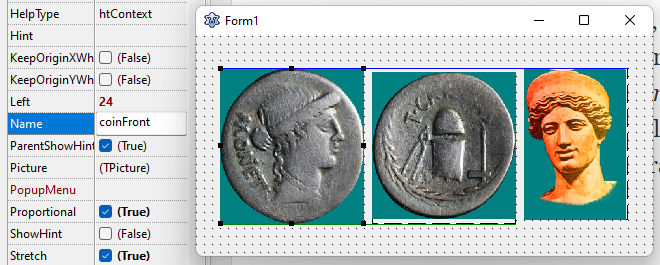
After saving and compiling (CTRL + F9), the necessary image data will appear within Resource Hacker within the RCData → TFORM1, or whatever you named the form. The chunk of data between the { } of the Picture.Data property of each TImage object can then be copied to the corresponding Picture.Data of the TSPLASHFORM within the Moneta executable. Some final alterations were necessary to better scale and format them, largely by adding a Proportional = True property. For one text label that was clashing with the Juno image, adding a simple Transparent = True property removed the solid background.

A lot could be said about the application's original user interface... "Not pretty, but functional" is probably the most polite way to put it. Above you can see the comparison of the original and the altered, which again was just an exercise in swapping some of the components without deviating from the original arrangement. In the time I've spent writing this blog and hacking to patch and improve this old piece of software, I realistically could've cranked out a modern web application to mimic the functionality more elegantly. But I felt obliged to make this an educational exploration for the benefit of others.
Phase 8: Packaging It All Up with a New Installer
 As detailed earlier in this guide, there are many different products available for creating bundled installers. The original installer used for Moneta was InstallShield 3 and not compatible with 64-bit operating systems. Not only that, but its overall feature set is quite primitive by today's standards. We don't need much for the installer, so any modern free alternative will work just fine.
One of the first programs I ever developed some 20 years ago was packaged up using Inno Setup. All these years later, Inno Setup 6 remains a solid and easily configurable choice available for free and with frequent updates. The latest version dropped support for Windows XP but supports all other 32-bit and 64-bit versions of Windows. Although the newest installer features an alternative modernish appearance, for the sake of absolute compatibility including with Windows XP I will stick to Inno Setup 5.6.1 from 2018. A portable package would be convenient, but the custom Numus font used by it requires a formal installation in the system fonts directory.
Revisiting the Database Requirements
 Before we start preparing the installation script, recall that Borland Database Engine is pivotal to the application and makes up a large portion of the original installer including dozens of registry entries and files. However, BDE has not been actively maintained for many years and it seems overkill to bundle the full package with registry changes, control panel modifications and so on all for this singular legacy application.
Fortunately, many applications will check their own folder for DLLs and dependencies before branching out to check system install paths and OS-wide libraries. This is what makes it possible to apply patched DLLs and override certain functionality in many cracked and patched programs, without intervening with the underlying operating system itself.
This holds true for the Moneta BDE requirements as well. Instead of dealing with 64-bit compatible BDE installations and configurations, which would add great complexity to the installer, we can include the DLLs and related BDE components directly in the application directory and it'll work just fine. You'll generally want to verify redistribution licenses when including third party DLLs. In this instance, Delphi and C++ Builder applications including the original Moneta inherently allow distribution of BDE (which itself is now two decades obsolete, besides).
Building the Installation Script
After installing and launching Inno Setup, we are taken to a basic script editor. Since this installer will be largely boilerplate, we can create a new script using the Inno Setup Script Wizard. It asks for basic metadata, installation path, a list of files and so on.
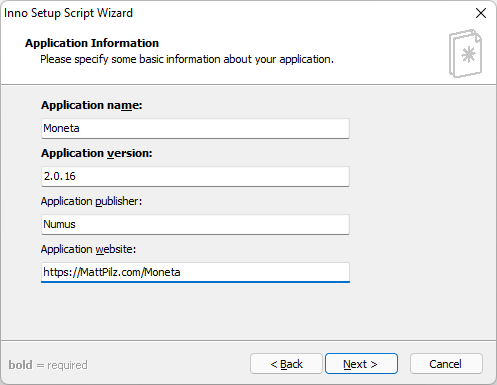
 A quick run through of the wizard screens will produce a simple text-based script containing some default app metadata, source and destination material and other actions including the creation of a desktop and start menu shortcut. To make things clean and organized, I created a base folder to store the installation script ("Moneta-Setup.iss") and then created subfolders:
- Dist — Includes the complete source files (application directory), as compiled throughout this guide.
- Fonts — Includes copies of the various fonts that will need to be installed.
- Icons — The original and inspired icons used in the application shortcut. I include a copy of these in the application folder too, for reference.
- Output - The directory that the final install executable will be placed.
In addition, I have created four DPI variants of a simple installer title graphic, as well as a scaled version of the original icon. These are referenced in the script using the WizardImageFile and WizardSmallImageFile properties, to personalize the appearance of the installer a little. Although modern installers discourage a welcome screen, I still like it for this install to display the visual of the product (this is done by adjusting the DisableWelcomePage property).
Since all of the files are contained within sub folders of the installation script directory, I also prefer to use relative paths for each reference within the script. This will ensure that if the installer directory gets moved to a different drive or location, the references will not need to be updated and will still work fine. To include all of the subfolders and application files found in the "Dist" folder, I use: Source: ".\Dist\*"; Fonts can be installed using a FontInstall parameter. Icons are done similarly.

Due to the way modern versions of Windows disallow non-admins from writing to specific system and program directories, I opted to set the default install path to a "Moneta" directory on the root drive (DefaultDirName={sd}\{#MyAppName}). {sd} is a Directory Constant that points to the operating system's root drive, such as C:. With everything set, we can select Build → Compile (CTRL + F9) to generate the final setup executable. Any errors and warnings will be noted in the Compiler Output window. The final installer can be tested via Run → Run (F9).
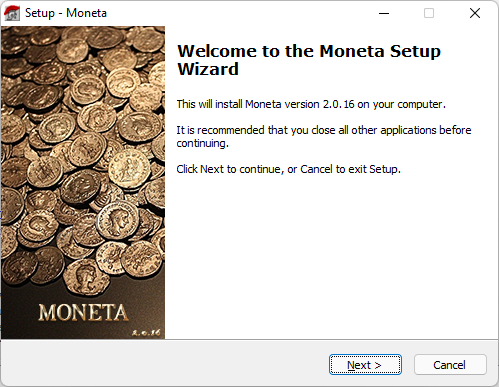
And there it is... A 1990s application that has been lost and inaccessible, now fully working and packaged up in a nice modern-supported installer. Since the application is all self-contained within the "Moneta" folder once installed (except for the custom fonts) you can back up the entire directory and move it wherever you want. Just remember to reinstall the fonts if you get a new computer; the custom ones are included in the Numus/Moneta2/Fonts folder).
- Moneta-Setup.exe (2022 - v2.0.16 Patched - 100% Clean per VirusTotal.com)
Phase 9: Whitelisting the Installer Executable
The advent of malware defenses built into recent versions of Windows has led to some frustrating side-effects for independent developers working on obscure or frequently updated applications. Any executable that isn't part of Microsoft's whitelisted database can result in the SmartScreen or Reputation-based Protection prompt the first time it is launched. Additionally, select antivirus utilities may false flag an executable it is unfamiliar with, adding to the overall suspicion a user may have when opening new downloads. Here are the resolutions to both of these problems:
Whitelisting the Executable with Microsoft
To prevent the SmartScreen popup (beyond just disabling that blasted feature , the executable has to make it through Microsoft's security clearance. Traditionally and among many discussion threads, it was speculated that this process required obtaining a verified publisher certificate that cost hundreds of dollars and a lot of time.
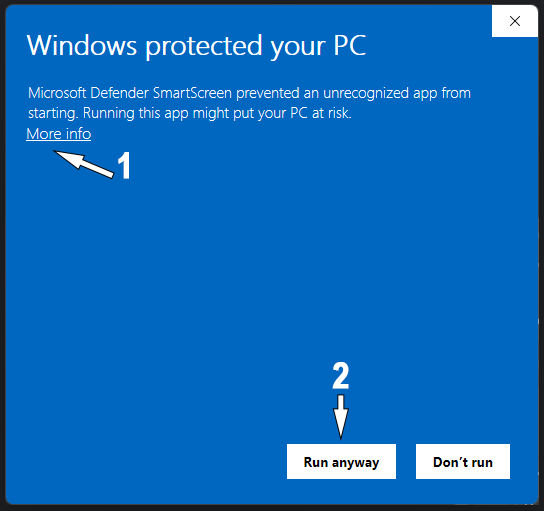
Fortunately, there's an alternative free and fast route toward verification that anyone can proceed with as follows. This assumes you have an established software presence even as a sole proprietor or individual.
- Visit Microsoft's Malware Analysis Submission portal: https://www.microsoft.com/en-us/wdsi/filesubmission.
- Select Software Developer for submission type and press Continue.
- Login using your Microsoft developer account, or create a new one if necessary.
- Select Microsoft Defender Smartscreen for the security product (Windows Defender should work, too).
- Input the rest of the metadata as needed, a lot of it is optional.
- Browse to select the executable needing to be verified.
- Check the option "Incorrectly detected as malware/malicious" and then for Detection name enter "Unrecognized App" or "Incorrect Detection."
- Provide a brief description to indicate that the executable prompts SmartScreen on launch, and then click Continue.
- After submission, you can return to the provided URL in the email confirmation to review its status.
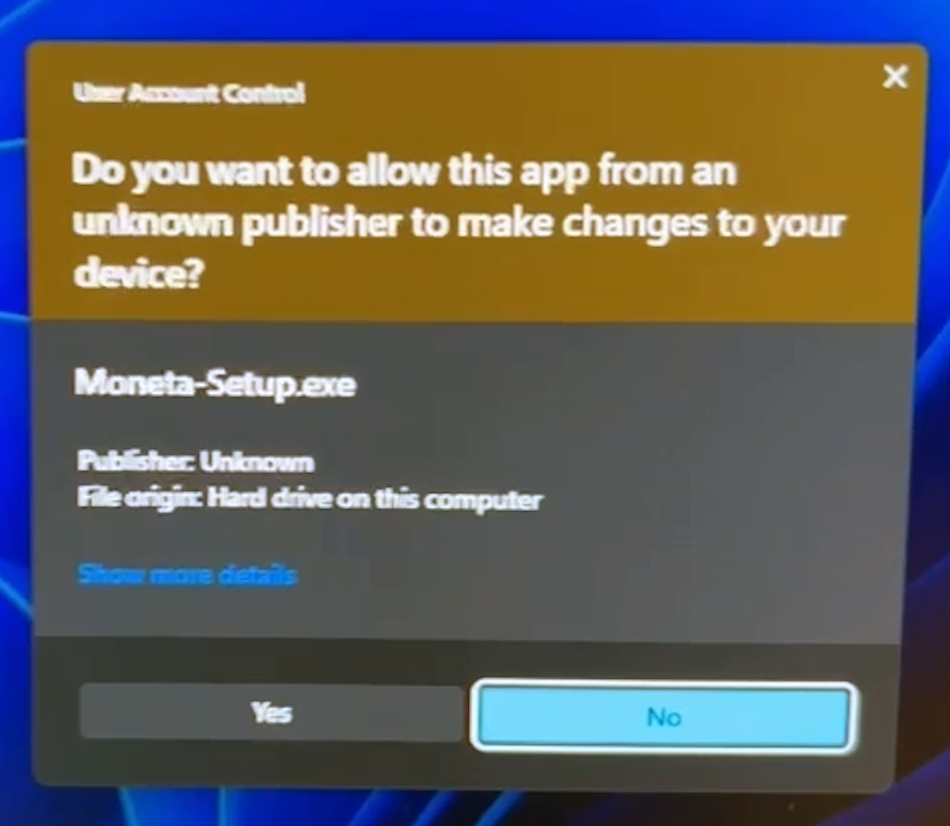
In a short while, usually within hours, an email confirmation will arrive to affirm the whitelisting. Note that SmartScreen is not to be confused with User Account Control (UAC), which will still prompt the user to continue for any unsigned executable that requires administrative privileges to install. Since Moneta requires system-level font installation and must support the full spectrum of Windows operating systems, to circumvent this would require signing it using a paid trust certificate, which can cost hundreds of dollars a year and certainly not something that'd be done for abandonware. If the application does not require any system changes, the "PrivilegesRequired" property in the Inno Setup script can be set to "lowest" to avoid elevated requirements. (Later builds of Windows 10 began allowing user-specific font installs without elevated access.)
Whitelisting the Executable with Third Party Antivirus
Although Windows Defender is sufficient enough to protect most end users from common exploits and viruses, it's still not uncommon for users to have any number of third party antivirus utilities installed. Some of these products will more readily classify unknown or bundled executables as suspicious or even classify them as trojans. To see how well a given executable fairs among all of the common and lesser-known virus suites, you can upload it for free to VirusTotal.com.
Out of 60-70 scanners, it is almost inevitable that at least one will cry about any new executable you throw at it. The process of enlightenment in pursuit of the perfect 100% clean status then becomes a whack-a-mole style adventure.
Most antivirus solutions have an area on their website where you can upload a sample for review and exclusion. These processes rely on the hash of an executable, so every time you alter the underlying file stands another chance of being erroneously flagged as malicious by certain products. This is why most frequently updated programs don't bother with the process when only a few generally unpopular products mark them as malicious.
In the instance of the new Moneta installer, SecureAge/APEX was the single outlier that flagged it generically as malicious. I was able to submit the executable through their false positive report form and in a short amount of time received notification that it had been whitelisted.
 At some point in time, another scanner popped up with a false positive, McAfee-GW-Edition and classified it as BehavesLike.Win32.AdwareFileTour.vc. The process to get whitelisted on that platform is similar. They indicate that these submissions are generally processed within two working days.
Alas, Moneta has been resurrected!
Guide and patch by Matt Pilz - 2022
Original software by Numus - 1990s-2009
Follow this methodology at your own discretion!
(An archive.org copy of the application including ISOs of the originals is here: https://archive.org/details/moneta-roman-coin-program-collection)





I am extremely impressed! Thank you so much. I too had purchased Moneta and had my collection stored in there. I maintained my access a much cruder way by creating a 32bit XP image and running it with Hyper-V. I had done some of your tracing down of files, .dlls etc. and had also concluded that it was ATTRIBUT.db that contained the countdown log ins. I had saved out a good copy of this file from when it was first installed and had a link to where the installed file and prior to launching the application each time would replace the file in its folder, giving me access to the program I had purchased and the coins inside. After years of frustration and multiple times of looking for a replacement software without success, I had asked friend who works with databases if he could figure out which database it was created in and change the installs to something like 99999 like you had. When he searched for info on the file he found your site. Thank you again!
Wow... lots of detail way over my head! I'm an original user with a license... but years ago that PC crashed... I still have the software disk and booklet... in a nutshell, what do I do to get the program running on a Windows 10 laptop? I'm not a computer guru, so it'd be an install and use type of thing... ty!
Hi Jeff, installing is just a matter of downloading my patched executable and running it to follow the installation wizard.
https://mattpilz.com/downloads/Moneta-Setup.exe
All of the technical substance is just describing the process of eventually making this final working executable. Good luck!
Hello, Matt. I just find this site today. I think my husband make this Moneta CD. He is still alive. but he is getting old and probably
can not update this Moneta system. He already know you modified this system update well. and he is grad to you did for coin collectors. I just want to comment for your great work. Thank you!
That is wonderful news! I appreciate the update and am glad he is well and was okay with me patching this. My friend who asked me to take on this task has traveled the world collecting roman and ancient coins and wrote a textbook on the subject. Many in the coin collecting circle often refer to his reference material (Matt Sersch Collection - https://msersch.ancients.info/) He tried so many other coin collecting programs and said nothing compared to the program your husband wrote so many years back. So it is great to hear an update from you!