


![]() When I list items for sale on eBay, I use a custom-developed HTML template with the item's pictures uploaded externally and embedded into the description for more visual appeal than what eBay provides. This allows me to apply custom styles to the images via CSS, provide descriptive content below specific images and generally offers a lot more flexibility and professionalism.
When I list items for sale on eBay, I use a custom-developed HTML template with the item's pictures uploaded externally and embedded into the description for more visual appeal than what eBay provides. This allows me to apply custom styles to the images via CSS, provide descriptive content below specific images and generally offers a lot more flexibility and professionalism.
By default, eBay allows you to upload up to 12 images for free to be included in the ad, and requires uploading at least one image through their service to be displayed in the auction results and so forth. The images uploaded in this manner appear at the very top of the auction page alongside the auction metadata. These eBay-hosted pictures are scaled to 500x375px regardless of the user's screen resolution, with an option to view larger versions by clicking/hovering over them.
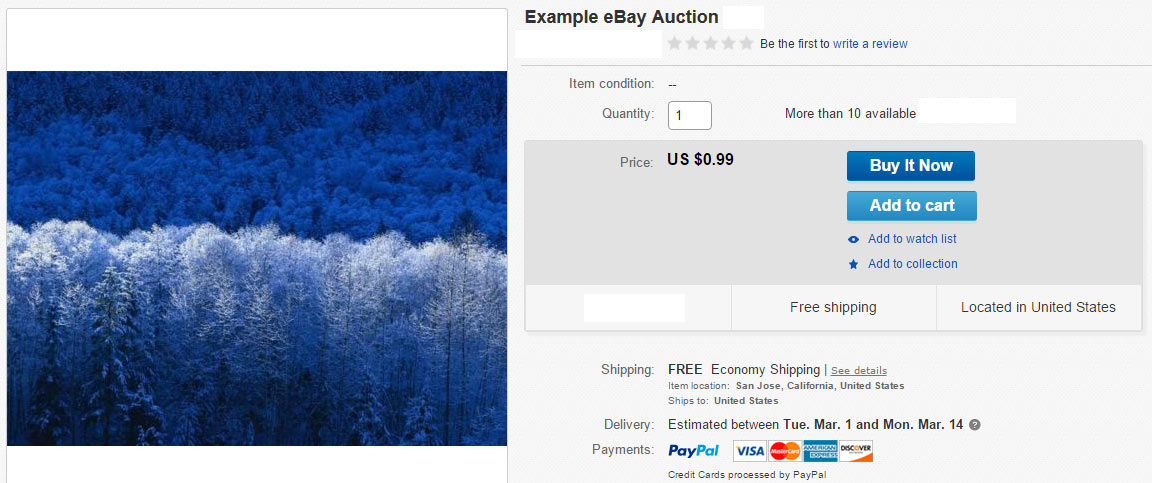
An example eBay ad depicting the fixed image resolution and placement using the default eBay image hosting.
This layout is convenient for when users first visit an auction or when there is not a lot of descriptive content needed, as all the information the user needs is right up at the top without needing to scroll. The functionality of the image slideshow and enlarging has also improved substantially over the years from when eBay first started offering free image hosting. I want to also emphasize, before describing my automated method of image processing and hosting, that it is still essential to use eBay's own image hosting service alongside your own (for up to 12 images) so that you can still embrace their free top-of-the-page slideshow.
The Tedious Process of Manually Hosting Pictures
There are usually a lot of steps involved in taking photographs and ultimately embedding them into your eBay auction description. In my case, managing images (with or without using eBay's own service) proved to be the most time-consuming process of listing an item. The basic process of capturing, transferring, optimizing and re-saving images can itself consume a lot of time. The general method many people use for manual image preparation and hosting is as follows:
- Take the photographs of the item you wish to list on a digital camera.
- Transfer the pictures to your computer using a card reader, direct connect or via WiFi on supported cameras.
- Open the images in a photo editor and resize them to reduce file size and load time.
- Enhance each image by adjusting brightness, levels etc.
- Re-save the optimized images, renaming them as needed.
- Connect to an FTP server or file host via a third party application.
- Upload all of the auction item pictures to the remote server.
- Add custom HTML tags for each image within your auction description, specifying the full URL and image names accordingly.
Writing an Automated Script to Do It All
I hate needless repetition and boring tasks. With that in mind, I set out to create a completely automated system of transferring, resizing, enhancing, saving, uploading and embedding images into a custom HTML document. Essentially, I wanted to be able to perform steps #2 through #8 above with a single click after inserting my camera's memory card into my computer. The end result is a batch file that does exactly that!
Baseline Script Requirements
To successfully use my automated script provided below, a few basic requirements need to be in place.
- You must have a memory card reader for transferring your camera's photos (direct connect would also work, but WiFi will not).
- You must have an external FTP server/host available for transferring the images to (e.g., ftp.example.com) and know the login credentials.
- You must know the location on the FTP server where your eBay images should be uploaded to, and that directory must be created. (e.g., /ebay/)
- You must know the absolute URL of where the images are accessible once uploaded (e.g., http://example.com/ebay/)
- You must have the ImageMagick command-line tools installed and available to the system (see below).
- You should transfer the photos via this script on a per-item basis (i.e., after taking a set of photos for one specific item).
Using ImageMagick for Image Enhancements and Optimization
 To apply image enhancements and resizing as part of the automated process, I embrace the free, cross-platform library ImageMagick. This set of tools enables you to perform any number of programmatic operations on as many images as needed from a command-line interface, in a very efficient manner. To install the necessary components, head on over to the Binary Releases page of the ImageMagick website and review the instructions for your particular platform.
Note that I wrote my script to run on Windows as a standard batch file, so if you are using another operating system you will have to revise the script accordingly using commands available to that platform. For Windows, there are a number of ImageMagick binary packages available. You will want to get the one that matches your machine's architecture (32-bit or 64-bit); the static variant works fine for this process. In this example, I downloaded the ImageMagick-6.9.3-5-Q16-x64-static.exe installer and ran it. I changed the install path to C:\ImageMagick\ as a personal preference so that it is a short path with no spaces and within a writable location.
Important: To verify that ImageMagick has been installed and mapped correctly on your machine, open a command prompt / terminal and enter:
|
1 |
convert -version |
You should then see a few lines of information about the currently installed version of ImageMagick—this means it is ready to roll! If you attempt to run this command in a write-protected directory, you may instead get the message "Invalid drive specification." Don't fret, this still indicates that the ImageMagick library is installed successfully.
If you instead get the message that "'convert' is not recognized as an internal or external command" when running the above command, you will need to add the base path (i.e., c:\imagemagick\) to your environmental path.
Finally, the Script!
With all that headway taken care of, all that remains is to present my batch file script. You will want to copy the contents below into a new text file, and save it as "Images.bat" or whatever you prefer. The batch file should be placed in the base directory where you wish to store all eBay photos on your computer (i.e., C:\ebay\). Make sure, when saving, to wrap the name in quotes to ensure that the extension is not overwritten (especially important if using Notepad).
As a convenience, the script below can also be downloaded as a batch file here: Images.bat
Important: See below the script for initial setup details.
|
1 2 3 4 5 6 7 8 9 10 11 12 13 14 15 16 17 18 19 20 21 22 23 24 25 26 27 28 29 30 31 32 33 34 35 36 37 38 39 40 41 42 43 44 45 46 47 48 49 50 51 52 53 54 55 56 57 58 59 60 61 62 63 64 65 66 67 68 69 70 71 72 73 74 75 76 77 78 79 80 81 82 83 84 85 86 87 88 89 90 91 92 93 94 95 96 97 98 99 100 101 102 103 104 105 106 107 108 109 110 111 112 113 114 115 116 117 118 119 120 121 122 123 124 125 126 127 128 129 130 131 132 133 134 135 136 137 138 139 140 141 142 143 144 145 146 147 148 |
@echo off setlocal disabledelayedexpansion REM Automated Image Processor Script for eBay REM Created by Matt Pilz - 2016 REM http://mattpilz.com/ REM ######################################################## REM ## Initialization and Variable Declaration ## REM ######################################################## REM Image counter variable for the renaming process set /A Counter=0 REM FTP Server Details set ftp_host=ftp.example.com set ftp_user=ftpusername set ftp_pass=ftppassword set ftp_dir=/ebay/ REM Remote URL where images reside once uploaded (include trailing slash) set url=http://www.example.com/ebay/ REM Local path to base of memory card where photos are (include trailing slash) set memorycard=E:\DCIM\12345678\ REM Prefix of all memory card images, as named by camera (i.e., DSC) set imageprefix=DSC REM Image width to resize to (Note: 1390px is the maximum on eBay; anything larger is wasteful) set imagewidth=1100 REM Enable Delayed Expansion for HTML tags etc. later on setlocal enabledelayedexpansion REM Start and end tags for image HTML code generation set imgstart=^<img src=" set imgend=" alt="eBay Auction Item Image"> REM Prompt user for base photo name set /p FName="Base Photo Name: " REM Delete temporary HTML file, if one exists from last run del html.txt 2>NUL REM ######################################################## REM ## Create Directory with Current Date (YYYYMMDD) ## REM ######################################################## echo( echo *** Creating Directory *** echo( REM Create temporary file for extracting formatted date via JavaScript echo var D = new Date() > temp.js echo D = (D.getFullYear() * 100 + D.getMonth() + 1) * 100 + D.getDate() >> temp.js echo WScript.Echo( 'set YYYYMMDD='+D ) >> temp.js echo @echo off > temp.bat cscript //nologo temp.js >> temp.bat call temp.bat del temp.bat echo Directory: %YYYYMMDD% REM Create new directory for current date (if it doesn't exist) mkdir %YYYYMMDD% 2>NUL REM Navigate to new directory cd %YYYYMMDD% REM ######################################################## REM ## Transfer Photos from Memory Card ## REM ######################################################## echo( echo *** Transferring Images *** echo( REM Move all memory card photos to local directory move !memorycard!*.* . REM Rename image extension for subsequent processing ren !imageprefix!*.JPG *.tmp >NUL REM ######################################################## REM ## Optimize and Resize Photos using ImageMagick ## REM ######################################################## echo( echo *** Optimizing Images *** echo( REM Use 'mogrify' to normalize, reduce quality and resize images mogrify -normalize -quality 60 -resize %imagewidth%^> *.tmp REM ######################################################## REM ## Rename Images to Proper Name and Generate HTML ## REM ######################################################## echo( echo *** Renaming Images and Generating HTML Code *** echo( REM Iterate through new images for /f "delims=" %%i in ('dir /b /a-d *.tmp') do ( REM Rename images to final name set /A Counter+=1 ren "%%~i" "%FName%-!Counter!%.jpg" REM Generate HTML image tag code set imgname=%FName%-!Counter!.jpg @echo !imgstart!!url!!imgname!!imgend! >> html.txt ) REM Copy HTML tags to clipboard type html.txt|clip REM del html.txt 2>NUL REM ######################################################## REM ## Upload Images to Server ## REM ######################################################## setlocal disabledelayedexpansion echo( echo *** Uploading Images *** echo( REM Create temporary file with FTP execution details echo user %ftp_user%> ftpexec.bat echo %ftp_pass%>> ftpexec.bat echo binary>> ftpexec.bat echo cd %ftp_dir%>> ftpexec.bat echo prompt>> ftpexec.bat echo mput %FName%*.jpg>> ftpexec.bat echo quit>> ftpexec.bat REM Call FTP command to transfer files ftp -n -s:ftpexec.bat %ftp_host% REM Clean-up del ftpexec.bat |
Initial Script Setup
The script is well-commented and generally self-explanatory. Under the "Initialization and Variable Declaration" section, you will need to update the following:
- FTP Details: Your FTP host, username, password, and directory to navigate to once connected before uploading images (the directory must already exist). Note that since this is stored in plaintext, you may wish to create a custom FTP account through your host and restrict its access to the ebay pictures folder, and use those account credentials here.
- Remote URL: The absolute URL that the images will be accessible at. (i.e., http://www.example.com/ebay/)
- Memory Card: The full system path to your memory card's photo location (i.e., E:\DCIM\123D4567\)
- Image Prefix: The first few letters or numbers that your camera prepends to each image (i.e., DSC).
- Image Width: The width, in pixels, that the image should be resized to. This depends on your HTML template but should never exceed 1390px as that is the maximum available space eBay provides for the description content (1460px body - 70px padding).
When you launch the batch file, you will be prompted for a Base Photo Name. This should reference the item in a few unique letters to ensure no conflicts arise when uploading to the server (i.e., alarmclock). The script will then name the images accordingly (i.e., alarmclock-1.jpg, alarmclock-2.jpg).
After entering the base photo name, hit ENTER and the rest should be automated! At the end, the HTML image tag code will already be copied to your clipboard and ready for insertion into your favorite HTML template or directly into the eBay description field.
Script Notes and Information
- Delayed expansion is disabled and enabled a couple times in the script to best handle different types of variables and operations.
- A temporary JavaScript file is created to generate a YYYYMMDD string of the current date, for the folder naming, and is then deleted.
- The images are temporarily renamed to *.tmp during processing to prevent conflicts with previously stored images in the same directory; if you are using the script to process multiple photo sets on a single day, this ensures no file overwriting or redundant processing.
- The ImageMagick tool Mogrify is used to enhance and optimize the images. I apply the "normalize" filter to improve visual contrast and brightness, but you can experiment with others such as "auto-levels" for differing effects.
- A temporary text file is created in the current picture directory named html.txt that stores the generated HTML image tags with the uploaded image paths. This data is copied to your clipboard automatically by the script, but the file is preserved so that it can be accessed in the event that you copy something else to your clipboard before pasting the data. You can uncomment line 133 (del html.txt 2>NUL) if you'd wish for this file to be deleted automatically.
- The FTP functionality creates a temporary secondary batch file for queuing the FTP login, navigation and uploading commands. This file is deleted automatically on finish.
Making the Images Responsive and Getting Creative
The script presented above generates the bare-minimum HTML required for inserting full-sized images into your custom HTML template. As-is, this method will display the images at their original dimensions (as defined via the imagewidth declaration and up to 1390px wide on eBay) regardless of the user's screen resolution or platform. This means that on mobile devices–where the user may only have a 320px wide viewport–the page contents in their entirety will be shrunk down on most browsers, resulting in the microscopic text effect seen often on non-mobile optimized sites and forcing the user to zoom-in and scroll horizontally.
There are a few simple ways to remedy this issue. One could hard-code width="100%" height="auto" attributes into each image tag (by modifying the script above slightly), thus ensuring that the images will stretch to the maximum space allocated by its parent container. However, this adds unnecessarily to the body content and also provides quite limited customization. My personal recommendation is to instead embed the generated image HTML code inside of a custom parent container, and then add styles to your template that set the parent image container attributes along with the images themselves, as follows:
Insert the generated image HTML tags into a custom image container element:
|
1 2 3 4 5 6 7 8 |
<!-- Images Container --> <div class="imgContainer"> <!-- Image HTML --> <img src="http://www.example.com/ebay/image-1.jpg"> <img src="http://www.example.com/ebay/image-2.jpg"> <img src="http://www.example.com/ebay/image-3.jpg"> </div> |
At the top of your template code, add styles for the image container and item images.
|
1 2 3 4 5 6 7 8 9 10 11 12 13 14 15 16 17 18 19 20 21 22 23 24 25 |
<style type="text/css"> /* Images Container */ .imgContainer { max-width: 100%; text-align: center; margin: 0 auto; } /* Item Images */ .imgContainer img { border: 1px solid #000066; margin: 1em auto; width: 100%; height: auto; background-color: #5187f6; border: 1px solid #293b6d; box-shadow: 0 0 5px rgba(37, 37, 102, 0.6), 0 0 50px rgba(37, 37, 102, 1) inset; border-radius: 15px; padding: 3px; position: relative; display: block; } </style> |
The .imgContainer styles ensure that it will not exceed 100% width and also put in basic center alignment properties so the images will appear centered on-screen. The .imgContainer img styles specify a 100% width and auto height so the images will scale to full-width while retaining their original aspect ratio. I also add some general styling to give the images soft corners, a shaded border and other basic attributes. If you do not want to scale-up any images beyond their original size, change the width parameter to max-width.
With this modified code, assuming your overall template container (either a TABLE or another DIV) also has a width property of 100%, the images will then scale appropriately depending on the user's resolution.
2016/03/20 Edit: Added a blurb about converting the generated images into a responsive format to ensure proper rendering on mobile devices.
Hi. Thanks for the article. Got a question though: are you sure about the 1390px limit? I've stumbled upon this listing today: http://www.ebay.com/itm/262317305586
What caught my attention was that not only the pictures in the body fill the whole width of the browser's window, but they also automatically resize when it's reduced. I'm using Firefox on a 1920x1080 laptop screen, and the photos in that listing seem to fill the whole screen's width (well, there's some padding of course, but still the pictures are well over 1390px wide). When I resize the browser's window and reload the page, the pictures are also downscaled.
Anyway, those photos look pretty sharp at 1920px screen width, do you think they were originally uploaded as =<1390px wide and ebay just upscales them for higher resolution screens? Or is it possible that ebay now can properly display photos wider than 1390px?
Hmm, when I download those photos from the body (right-click and "save image as") — they're only 1024px wide. I wonder whether it's their original resolution (the one that the seller saved them at) and ebay just upscales them for higher res screens.. or maybe not even ebay, but the web browser itself is what does all upscaling? Sorry if it all sounds stupid, I'm not good at all this web tech, just guessing here. 🙂
Hi Anton, I just added a short addition to this article about making the generated image code responsive. In the auction you referenced, they include a 100% width value within each image (and auto height), which scales the images to the boundaries of their parent container (in this case a table scaled to 100% of the available eBay ad space). So even if the images were just 640px wide, they would stretch to fill the available space. I personally prefer to manage this by inserting the image HTML code within a parent 'image container' and then styling them appropriately at the top of the template. This is the method I demonstrate in my amended post.