


Introduction
 In many ways, modern computers are alien compared to the hardware available during Windows XP's debut in 2001. Back then, hard drives connected through IDE instead of SATA and dedicated graphics cards were powered by the now-defunct AGP standard instead of PCI Express, which was years away from inception. 128 MB of RAM would make programs speed along and a 30 GB hard drive was substantial. External flash drives were still in their infancy and cost over $100 for 16 MB capacity. 64-bit processors were still a mythical prospect to consumers.
By comparison, a typical Windows 10 workstation computer in 2018 will have at least 8 GB of RAM and 1 TB of hard drive space. Gaming machines and those built to accommodate the latest hardware (e.g., Oculus Rift) will have 32 GB of RAM, a blazing fast solid-state drive for their OS and core applications, and a dedicated video card that itself can contain gigabytes of video memory. Broadband Internet and wireless connectivity are now commonplace and the days of dial-up modems are but a relic from the past. 64-bit processors are now the standard, rather than the exception.
![]() Despite all of the major OS releases since XP and the radically evolving technologies, I still find worthiness in maintaining a Windows XP install for specialized tasks (yes, this article is written in 2018). There are certain hardware products—including scanners, musical instruments and gaming components—that still serve a purpose but have no driver support beyond XP. Some software applications and games also lack compatibility with modern operating systems even if ran in compatibility mode or via a virtual machine.
Despite all of the major OS releases since XP and the radically evolving technologies, I still find worthiness in maintaining a Windows XP install for specialized tasks (yes, this article is written in 2018). There are certain hardware products—including scanners, musical instruments and gaming components—that still serve a purpose but have no driver support beyond XP. Some software applications and games also lack compatibility with modern operating systems even if ran in compatibility mode or via a virtual machine.
Several years ago I detailed the process of bringing XP compatibility to the NVIDIA Geforce 9-Series cards, and echoed similar sentiments about XP in that article. In this article, I will document the complete process I use in 2018 to install Windows XP 32-bit and Windows 10 64-bit on the same solid-state (SSD) hard drive with all modern hardware. Your mileage may vary, but hopefully the advice offered here will be of some benefit to anyone hoping to still run XP in this modern era.
Baseline Computer Specs Used in this Tutorial
 To set the foundation, here are the exhaustive specs of the computer and all peripherals that I will be installing Windows XP 32-Bit and Windows 10 64-Bit on, as a dual-boot setup from a SSD.
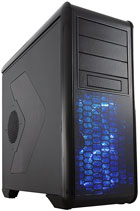
- COMPUTER CASE: Rosewill BLACKHAWK ATX Mid Tower
- POWER SUPPLY: EVGA SuperNOVA 1000 P2 220-P2-1000-XR 80+ PLATINUM 1000W
- MOTHERBOARD: MSI Gaming Z97 GAMING 5 LGA 1150 Intel ATX
- PROCESSOR: Intel Core i7-4790K Devil's Canyon Quad-Core 4.0 GHz LGA 1150 88W
- CPU HEATSINK: Cooler Master Hyper 212 EVO - CPU Cooler with 120mm PWM Fan
- MEMORY: G.SKILL Ripjaws X Series 32GB (4 x 8GB) 240-Pin DDR3 SDRAM DDR3 1600 (PC3 12800)
- VIDEO CARD: MSI GeForce GTX 980 Ti GAMING 6G GDDR5 PCI Express 3.0 x16
- SOUND CARD: ASUS Xonar DX 7.1 Channels 24-bit 192KHz PCI Express x1
- HARD DRIVE (PRIMARY): Samsung SSD 840 Pro Series SATA (256 GB)
- HARD DRIVE (SECONDARY): Multiple SATA drives (1-4 TB)
- OPTICAL DRIVE: SONY Black Blu-ray Burner SATA BD-5300S-0B - OEM
- KEYBOARD: Thermaltake Tt e SPORTS Poseidon Z Mechanical KB-PIZ-KLBLUS-01
- MOUSE: Logitech G700s 910-003584 Rechargeable (wired & wireless)
- MONITOR (DUAL PRIMARY): ASUS VG248QE Black 24" 144 Hz
- MONITOR (SECONDARY): Samsung 32" Class Series 5 5300 (M5300) 1080p HDTV
- PRINTER (1): Epson XP-630 (Inkjet)
- PRINTER (2): HP OfficeJet 7610 Wide Format (Inkjet)
- PRINTER (3): Brother HL-L2315DW (Laser)
- SCANNER (1): Epson Perfection V700
- SCANNER (2): Epson Perfection V600
- HEADSET: Logitech G930 (Wireless)
- AUDIO INTERFACE: Focusrite Scarlett 2i2
- MICROPHONE: Audio Technica ATR-2100
- WEB CAMERA: Logitech HD Pro C920
- GAME CONTROLLER: Microsoft Xbox One (Wireless)
- CARD READER: Rosewill RDCR-11003 - 3.5" 74-in-1 Internal Card Reader with USB 3.0 Port
- USB ADAPTER (1): SYBA USB 3.0 PCI-e w/ internal 19 Pin USB 3.0 Header SD-PEX20139
- USB ADAPTER (2): Inateck KT5001 PCI-E to USB 3.0 5-Port w/ 15-Pin Power Connector
- INTEGRATED ETHERNET: Killer E2200 Gigabit Ethernet
- USB WIFI ADAPTER: Netgear A6200
These components were not chosen based specifically on use or compatibility with Windows XP, since Windows 10 is the prominent operating system for almost all daily activity. As such, getting some of the components to cooperate nicely with Windows XP is not always an automated process. I will detail the issues and solutions as needed for my particular hardware where relevant in this article.
Installation Prerequisites - Slipstream XP (SSD / SATA) and Windows 10 DVD/USB
By default, the Windows XP 32-Bit installer does not support SATA connections. If you boot from a vanilla XP disc, you will need to manually load in the appropriate drivers for your hard drive(s) to be recognized. This traditionally required you to copy the drivers to a floppy disk, tap F6 during setup and then specify the disk drive. Obviously, this is not an accommodating approach given the lack of floppy drives and controllers on modern PCs. An unwise makeshift solution would be to set the SATA controller to ATA in the BIOS instead of AHCI—don't do this!
What you'll want to do is locate the proper SATA drivers for your motherboard and then slipstream them onto a custom Windows installer CD. Even if your motherboard manufacturer offers no support for Windows XP (like the MSI Z97 I use here) you will still be able to find the generic chipset SATA drivers for XP by checking a little lower-level. In my case, the Z97 is an Intel chipset that uses Intel® Rapid Storage Technology. With that knowledge, I was able to download the 64-bit compatible "floppy" version of the drivers from Intel's site directly. Please refer to your motherboard's specs to determine the embedded SATA chipset, and from there you can search for XP SATA drivers direct from the chipset manufacturer.
To load the SATA chipset drivers onto the installation CD, a custom slipstream version is required. The added benefit is that this method also allows you to preload all of the Windows updates to save time later on. This is made easy via nLite and UDC. There are hundreds of detailed tutorials on this subject, so I will reference a few below:
- Terabyte Unlimited - Creating a Windows XP Slipstreamed Disc using nLite
- Expert Reviews - How to Slipstream an XP Disc with SP3 and All Other Updates
- KOMKU - Integrate SATA Driver into Windows XP Installation CD using nLite
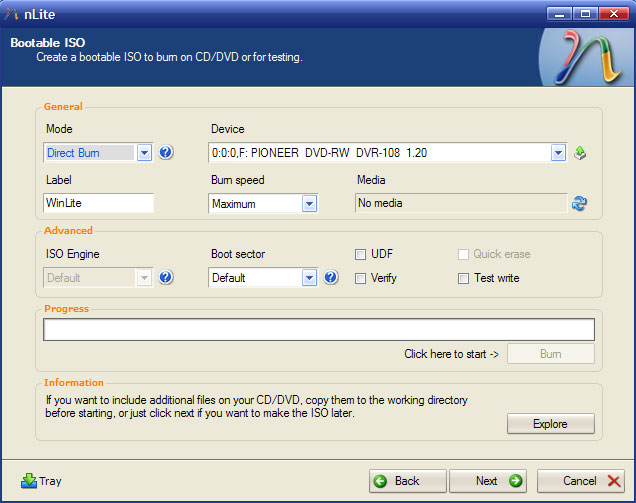
Use nLite and UDC to create a custom slipstream of Windows XP with updates and SATA drivers.
Once you have completed the slipstream process as described in the tutorials above, you should have a shiny new Windows XP CD/DVD with your preloaded SATA drivers and whatever optional updates you elected to apply. You could alternatively create a bootable USB installer,but that is more involved of a process and has more room for error, so my recommendation is to stick to a CD/DVD.
You will also need to create a Windows 10 64-Bit installer. The easiest route for this is to simply download the official Windows 10 Media Creation Tool and then run through the wizard. Basically, the process is as follows: Accept the Agreement → Create Installation Media for Another PC → Edition (Windows 10), Architecture (64-Bit) → ISO File → Select Save Location → Wait for Download to Finish.
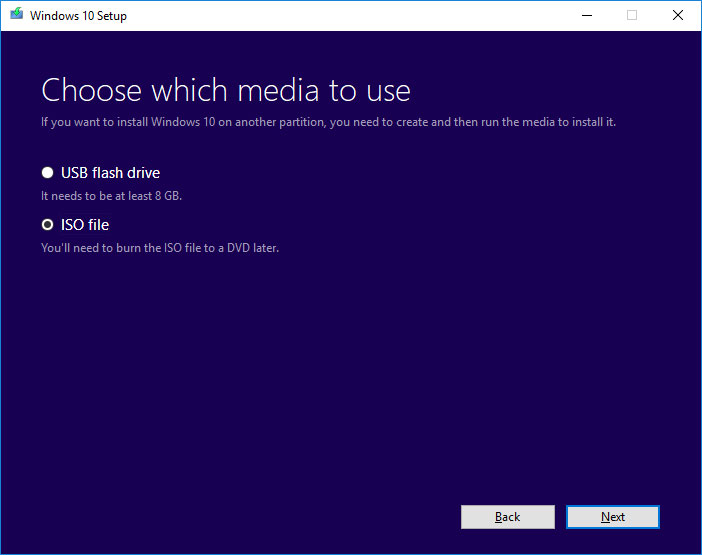
Use the Windows Media Creation Tool to download an ISO of Windows 10 to burn on a disc.
After the Windows 10 64-Bit ISO has downloaded, you can easily burn it by right-clicking the file and selecting Burn Disc Image. You can also use the freeware application Imgburn (my burning software preference) to burn the image and verify its contents.
At this point, you should have TWO installation discs ready for use:
- Windows XP 32-Bit CD/DVD slipstreamed with SATA drivers and optional SP3/hotfixes
- Windows 10 64-BIt DVD from Media Creation Tool
Before continuing, you may wish to verify that each disc can boot successfully to the Windows installer screen without incident. Typically, you can tap F11 when you first boot to open the boot menu, where you can then select the CD/DVD drive as the boot source. Make sure to select SATA instead of UEFI as the boot source if multiple options are listed.
You should also make sure that all of your hard drives are connected in the desired arrangement and visible in the BIOS before continuing. Reordering the drives after getting both operating systems installed without proper preparation can lead to boot loader corruption.
Starting Fresh - Wiping the Hard Drive
Although it is technically feasible to install Windows XP retroactively from an existing Windows 10 install, I highly recommend against it. Due to the drastic difference in boot loader tech between XP and Windows 10 and a bevvy of other potential complications, I find it best to start from absolutely nothing and install the operating systems sequentially. Doing so will eliminate dozens if not hundreds of iterative steps and subsequent requirements to get both of them booting properly.
The steps below will completely wipe your main OS hard drive. Do so at your own discretion and only after you have done a thorough backup. Also make sure to download a backup of any crucial drivers that may not be detected by default for your new install (WiFi / Ethernet drivers especially).
To begin, I like to completely erase the SSD drive and wipe out all existing partitions (starting from complete scratch). The simplest and most stable approach for this is to do so using the Windows 10 Installation Disc:
- Boot from your fresh Windows 10 DVD/USB (Select SATA instead of UEFI when booting from DVD if given the option). You can access the boot menu typically by tapping F11 when at the BIOS/CMOS screen but your device may vary. You'll have to also press any key to confirm booting from the DVD, when prompted.
- Click "NEXT." Click "INSTALL NOW." Click "I DON'T HAVE A PRODUCT KEY" (even if you have a key we don't need it yet) and click "NEXT."
- Select the desired OS (e.g., Windows 10 Pro or Windows 10 Home depending on your license) and click "NEXT."
- Click "I ACCEPT THE LICENSE TERMS" (after reading them, of course) and then "NEXT."
- Select "CUSTOM: INSTALL WINDOWS ONLY (ADVANCED)."
- Delete all partitions that are on the SSD drive (or your designated OS drive) to start from a blank slate (all existing system + OS Partitions). If there are other MSR/Reserved partitions on other drives but no other drive has a bootable operating system installed to it, you can delete those as well to avoid any conflict (they may be remnants from old OS installs on other drives). Leave the drive unpartitioned for now. Do NOT use the Windows 10 DVD to create any partitions before Windows XP is installed. Click "X" to quit the Windows 10 setup and shutdown.

Start fresh. Remove all existing partitions on your designated OS drive (all data will be lost).
Now that we have our hard drive devoid of any partitions, we can begin the Windows XP install while also setting up the appropriate partitions for both operating systems.
Partitioning and Installing Windows XP 32-Bit
As noted previously, the most error-free approach to getting a working Windows XP and Windows 10 dual-boot setup is to install Windows XP first. With a clean slate for our hard drive previously established, we can shift focus to partitioning and XP installation.
I recommend plugging in a traditional PS2 keyboard or USB-to-PS2 adapter if you have one before continuing to ensure maximum compatibility for the windows XP installer. At the very least, make sure your USB keyboard and mouse are plugged into USB 2.0 ports instead of USB 3.0. Some modern motherboards will not have proper drivers for native USB functionality from the windows XP install, unless you have slipstreamed the necessary USB drivers onto the CD previously. By using a PS2 keyboard, you can easily navigate all screens without a mouse if needed (e.g., via TAB and ENTER keys).
- Reboot using the slipstreamed Windows XP 32-Bit CD that contains the needed SATA drivers for the hard drive. If you are using a USB keyboard and it does not function, you will need to use a PS2 keyboard (reboot required if you plug it in after the installer loads).
- When the Windows Setup screen appears, press "ENTER." Then press "F8" (after reading the agreement, of course).
- Locate the SSD drive you wish to install the OS to, ensure that "UNPARTITIONED SPACE" is highlighted and then press "C" to create a new partition.
- Enter the partition capacity for the XP install. Note that with this utility, 1024MB = 1GB. Without wanting to eat up too much of the SSD for XP partition, I chose 8,704 to reserve 8.5GB of my 238.5GB available capacity. This is plenty of space for the full XP install and core programs, with enough wiggle room for any temporary files and file extraction as needed. A clean, full install of windows XP Profession 32-Bit consumes about 3.2GB of space (leaving 5.3GB to spare, in my example). If you plan to install large applications or games directly to the same XP partition you'll obviously want to make it bigger. I find it more suitable to use a less expensive SATA drive for most XP-based application installs and data storage needs, while preserving the bulk of the SSD space for the Windows 10 OS and applications (230 GB free for Windows 10, in my case).
- When the desired size has been specified, press "ENTER" to create the partition.
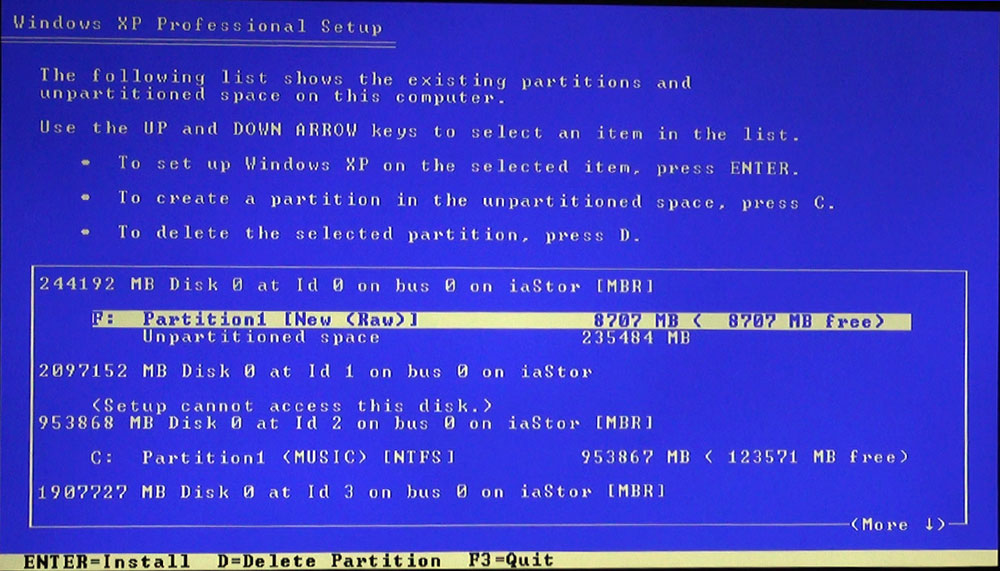
Create a new partition for Windows XP at the desired size. Here I use 8707 (8.5 GB) for the XP, saving 230 GB on my SSD for Windows 10.
After the above steps, we now have a single physical hard drive with one XP-ready partition and the rest empty and awaiting Windows 10. Although we could format the other partition as well from this screen, I prefer to let Windows 10's utility do that during installation since it also includes a system partition.
- Continuing on from the partitioning steps above, select the newly created partition ("PARTITION1 NEW/RAW") and press "ENTER."
- Select "FORMAT THE PARTITION USING THE NTFS FILE SYSTEM (QUICK)" and press "ENTER."
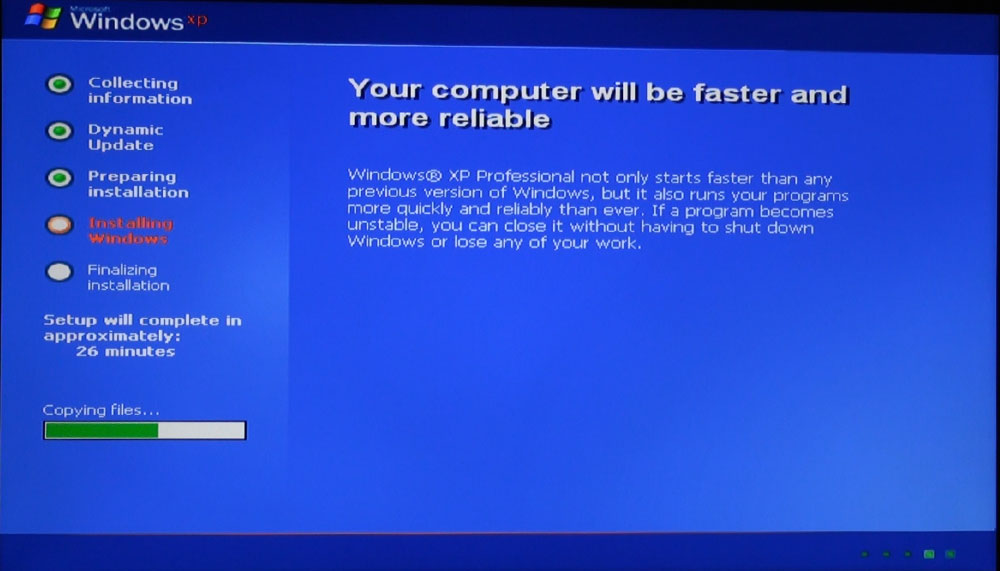
- After a moment, the partition will be formatted and the XP installer will enter "preparing" mode by copying the installation files to your computer.
- Wait for the XP installer to reboot the PC. Do NOT attempt to boot from the CD again, ignore if prompted. When the XP installation screen appears, follow the prompts as necessary until Windows XP has been successfully installed. You will be asked for a user name, computer name, product key and time zone among other basic prompts. Install XP as usual.
- After setup completes, you should arrive at the "WELCOME" screen of XP. Page through the welcome screen until you arrive at the windows XP desktop.
- Verify that Windows XP boots correctly by removing the CD/DVD and performing a couple resets and without tapping any keys. XP should boot up within a few seconds on modern hardware.
Follow the standard Windows XP installation process, entering your name, license key and other options when prompted.
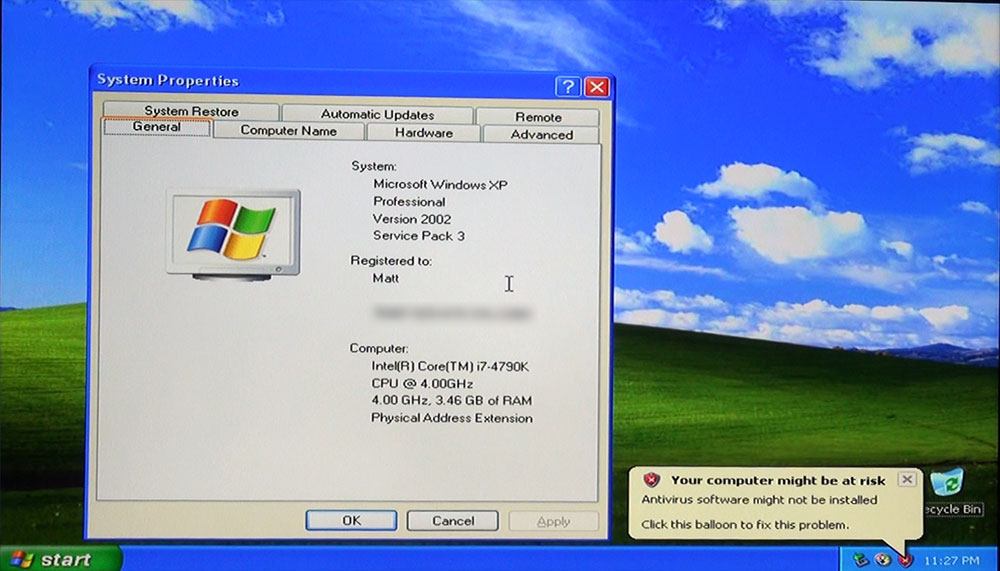
After setup completes, make sure you can boot to the Windows XP desktop without the CD. Here it is on a modern PC (32-bit limits RAM to 4GB but is the most compatible with software and hardware and more than sufficient for all XP-related tasks).
Installing Windows 10 64-Bit
With Windows XP booting successfully—albeit without any proper drivers yet—we can move on to installing Windows 10. Recall that we previously created two sections on the OS drive, a tiny partition for Windows XP and the rest for Windows 10. Here's how to install Windows 10:
- Insert the Windows 10 DVD/USB created previously and boot to it from BIOS (usually by tapping F11). Be sure to select SATA instead of UEFI if given the choice).
- Click "NEXT." Click "INSTALL NOW." If you do not have a product key and Windows 10 was previously installed on your machine as an upgrade or OEM, click "I DON'T HAVE A PRODUCT KEY" otherwise enter your key and click "NEXT."
- Select the desired OS (e.g., Windows 10 Pro or Windows 10 Home depending on your license) and click "NEXT."
- Click "I ACCEPT THE LICENSE TERMS" (after reading them, of course) and then click "NEXT."
- Select "CUSTOM: INSTALL WINDOWS ONLY (ADVANCED)."
- Click on the remaining "UNALLOCATED SPACE" of the hard drive that XP was installed to, then click "NEXT."
- Wait for the installation to finish. Your PC may restart during this time.
- Step through the basic Windows 10 configuration wizard. If you are using a USB WiFi or Ethernet card without native drivers, you may have to skip the Internet Connection check for now. I also recommend creating a simple local account. Once everything is set you can connect to the Internet, apply updates, switch the account to a Microsoft one for synchronization and so on.
- Restart the computer. An OS selector should appear after Windows 10 begins booting. At this point, both "WINDOWS 10" and "EARLIER VERSION OF WINDOWS" should work for selecting between the two OSes from the OS selector and you should test both after removing the DVD.
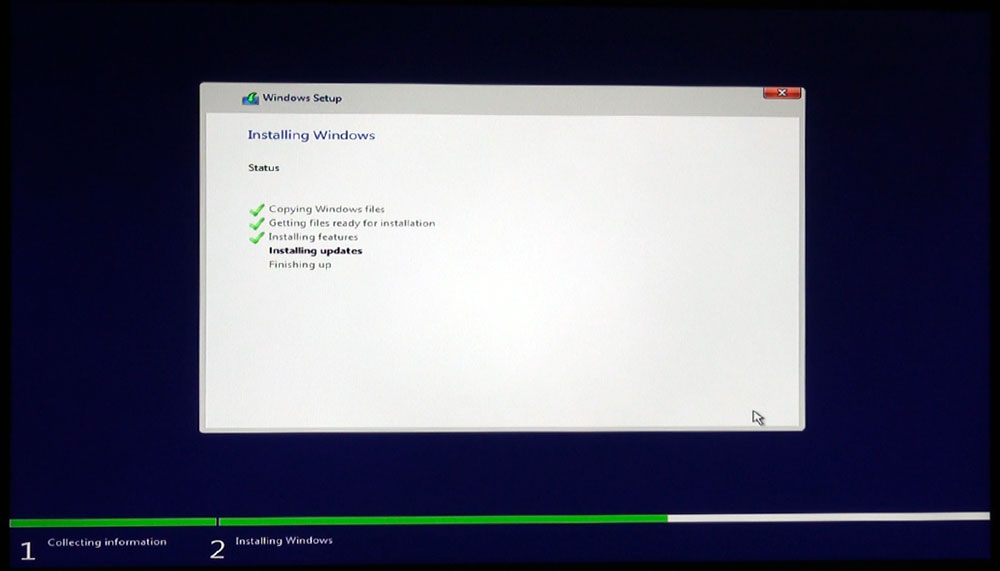
Follow the standard Windows 10 installation process, entering the appropriate information when prompted.
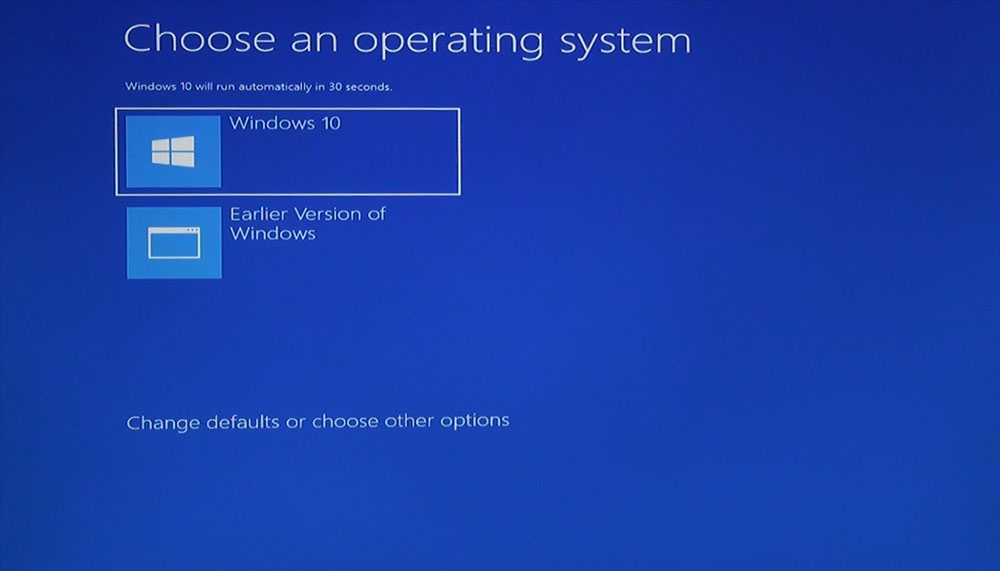
After installing Windows XP and Windows 10, a visual OS selector screen will appear. Test both operating systems to ensure they can boot (in the next steps we will make the boot loader better).
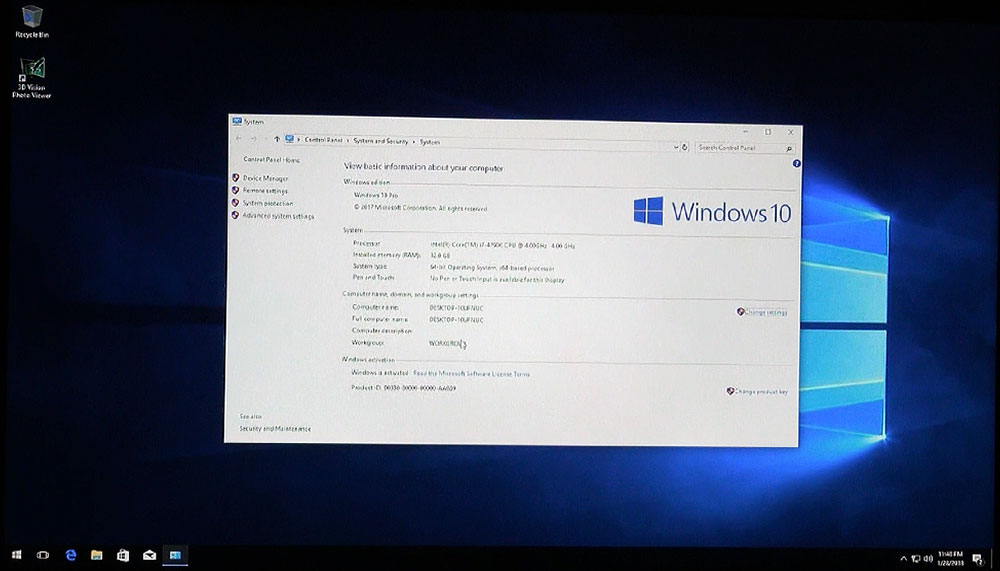
After setup completes, make sure you can boot to the Windows 10 desktop without the DVD. Here it is on a modern PC.
Following all of the steps above, you should now have a modern SSD/SATA drive dual-booting Windows XP 32-Bit and Windows 10 64-Bit. It is still not perfect, since selecting XP from the boot menu will force a full restart before it begins loading. But, assuming you can boot to either OS without error, you are in good shape already. We will improve the boot sequence in the next section.
Improving Boot Menu and OS Switching Efficiency
There are a couple techniques to improving the boot loader screen and make it easier and faster to switch between XP and Windows 10. To start, we will switch the boot menu to "legacy" mode from Windows 10. This will remove the visual OS selector and replace it with the traditional black screen selector, and more importantly will allow XP to load immediately upon selecting it without a reboot.
- Boot back into Windows 10. Open an admin cmd (right-click → Run As Administrator) and enter:
bcdedit /set "{current}" bootmenupolicy legacyYou should see a notice that "The operation completed successfully." This will restore the original legacy boot system. NOTE: Major Windows 10 updates might restore the visual boot menu. If that happens, simply enter the command above again. - Select System (Windows Key + Pause/Break) → Advanced System Settings → Advanced → Startup and Recovery. Change the "time to display list of operating systems" to 1 second.
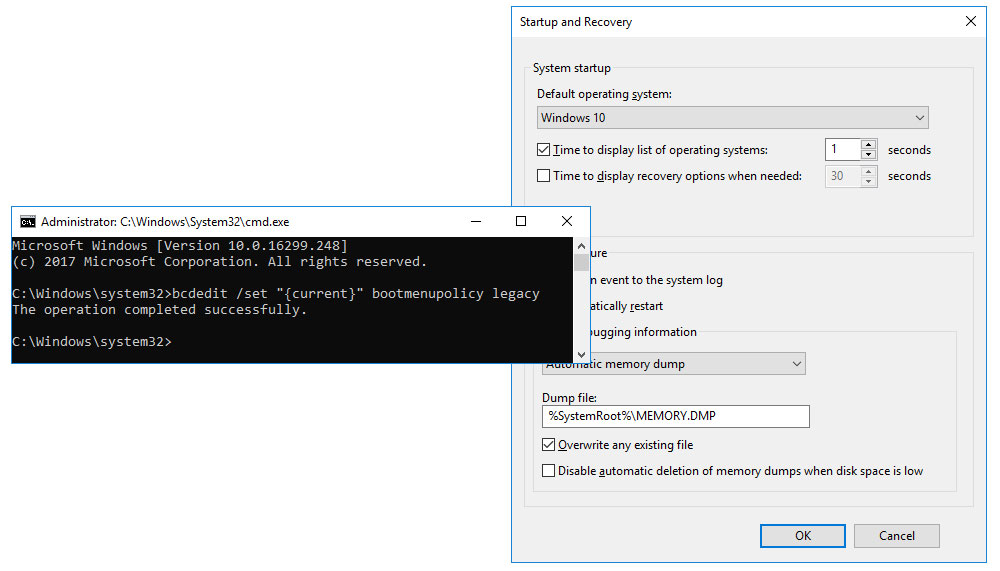
Make modifications to the Boot Menu to enable legacy mode and a 1 second counter to streamline the OS selection process.
After completing the above steps, reboot your computer. While booting, tap "up key" or "down key" so that when the boot menu appears it will not automatically select to the boot screen and you can choose from either system. Test booting into XP (it should boot within seconds without any reboot required) and also try Windows 10.
NOTE: As mentioned earlier, you may have to use a PS2 keyboard/mouse (or USB-to-PS2 adapter) temporarily for Windows XP, since modern motherboards don't always include working USB ports by default for XP. So if your keyboard and mouse don't function in XP in any USB port you try, you can temporarily use the PS2 port.
We can do even more to improve the convenience of switching from Windows 10 to Windows XP using EasyBCD and iReboot.
EasyBCD (NeoSmart Technologies) is a simplified GUI for managing the boot menu to greater complexity than what is possible using the default Windows Boot Manager. It is a freeware application if used for personal, non-commercial use. We already completed 99% of the boot loader settings ourselves in the steps above, but we can rename the boot menu items and so forth via EasyBCD. This application is also valuable for restoring and reconfiguring boot records after adding or removing hard drives, switching drive order, or installing an older OS when a new OS is already installed (an advanced topic).
- Boot into Windows 10 64-Bit. Make sure you can connect to the Internet (install the drivers for your WiFi or Ethernet card as appropriate).
- Open the EasyBCD landing page, scroll down to the "Non-Commercial" solution and click "Register."
- Optionally enter your name and email (not required to download) and click the "DOWNLOAD" button.
- Install the application by following the standard setup wizard.
- Launch EasyBCD, select your default language and accept the agreement for use of the free Community Edition.
- Click "Edit Boot Menu" and you should see the two entries appear in the list.
- Double-click on "Earlier Version of Windows" and rename it to "Windows XP" then click "Save Settings"
- You could optionally change the default to Windows XP instead of Windows 10 but I wouldn't advise this.
- There are a lot more options under Advanced Settings but in most cases you shouldn't modify those settings, since our boot system is already working and making the wrong change can result in an unbootable system.
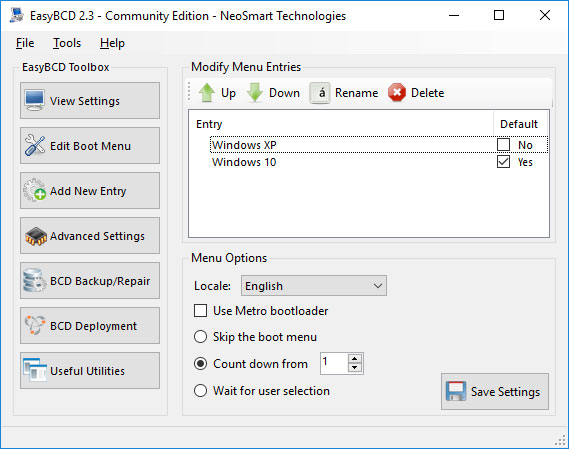
Optionally use EasyBCD to make additional modifications to the boot menu, such as changing the label to "Windows XP."
iReboot is another freeware application from NeoSmart Technologies that provides one-click reboot capability for switching between Windows 10 and Windows XP without having to worry about the boot menu at all. This makes it ultra convenient to switch between operating systems at will. This application has to be installed on both machines for maximum effectiveness.
- Boot into Windows 10 64-Bit. Make sure you can connect to the Internet (install the drivers for your WiFi or Ethernet card as appropriate).
- Open the iReboot landing page, scroll down and click the "Download (Non-Commercial Use Only)" button.
- Optionally enter your name and email (not required to download) and click the "DOWNLOAD" button.
- Install the application by following the standard setup wizard. Make sure that "Launch on Startup" is selected so that the ability to switch operating systems is always available. Then run iReboot.
- iReboot will appear as an icon in the taskbar near the clock (if you don't see it, click the up arrow to view all taskbar icons).
- Right-click the iReboot tray icon and then select "Reboot on Selection" to check it. This will enable one-click reboot to the selected OS.
- To boot to Windows XP from within Windows 10, right-click the iReboot tray icon and then select "Windows XP." The PC will reboot immediately to Windows XP.
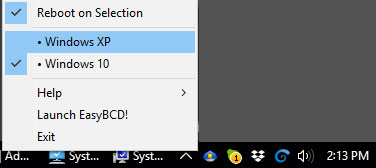
The freeware application iReboot allows you to conveniently switch between operating systems with one-click.
The same process described for iReboot above must also be done from Windows XP so that the option is available from both systems. Repeat steps 1-7 above from your Windows XP install (you may need to use a PS2 keyboard/mouse and install appropriate WiFi/Ethernet drivers first).
Driver Woes - Windows XP Hardware Tips and Tricks
For Windows 10, you can now freely install all drivers and updates as needed. I recommend running Windows Update (Settings → Updates → Check for Updates) and applying all discovered updates until the system is fully up-to-date. You may have to run it several times. You should also install all crucial drivers including for your video card, sound card, WiFi and Ethernet, motherboard and so on.
It gets a lot more complicated with Windows XP. Given the fact that Microsoft itself stopped supporting Windows XP in 2014, it is understandable that modern hardware manufacturers do not spend time or resources to support Windows XP anymore. You will not find "Windows XP" listed as a supported operating system for virtually any high end modern hardware, with no official drivers provided. Having repeated this very process ad nauseum with multiple modern computers, I will provide some tips and tricks below:
Motherboard Drivers
First things first, check the manufacturer website for your motherboard. Although increasingly rare, you may luck out and find that your motherboard still provides at least some Windows XP-compatible drivers. If so, you'll save a lot of grief by getting those installed first. If you are less fortunate and no XP drivers are available on the manufacturer website (such is the case with the Z97 and most recent motherboards), you'll have to get more creative. Note that a lot of features of the motherboard may still function even with just the default Windows drivers, but onboard peripherals will usually require dedicated drivers.
Regardless of motherboard brand, most are still comprised of common chipsets that do still have Windows XP drivers floating around. You can ascertain the embedded chipsets by reviewing your motherboard specs, third party technical reviews and by doing a visual examination of the motherboard to note the various identifiers on the embedded chips. From there, you can query the chipset website (instead of the motherboard manufacturer website) which will typically still provide legacy drivers.
Audio Drivers with XP Support
 Realtek AC'97 / High Definition Audio - Almost all motherboards include onboard audio in the form of HD Audio (or AC'97 for legacy audio). If you do not have a dedicated sound card, you can install working audio drivers for the onboard sound in XP through the referenced links. The last XP release for HD Audio is R2.74 (2014) and for AC'97 is A4.06 (2008). Make sure to download the version that indicates XP compatibility.
If you do have an external sound card but no XP drivers are available for it, you can still use the onboard HD Audio while in XP mode. Depending on your speaker setup, you may be able to run the onboard audio to one input and the dedicated sound card audio to another input and then switch accordingly depending on your OS. You could also pick up a cheap stereo audio selector to connect both cards and switch between them. A final solution would be to use a simple splitter but note that this could degrade audio quality.
 The latest line of Sound Blaster cards do not support Windows XP nor do any of the unofficially modded drivers. I am using an ASUS Xonar DX, which supports everything from DOS to Windows 10 and has comparative audio fidelity to most of the higher end Soundblaster cards. I had previously used a Sound Blaster ZX, with onboard HD Audio for Windows XP using another input on my speaker system. Xonar provides full support for all operating systems complete with 7.1 audio so is more convenient. If you have a Xonar sound card, you should also consider the unofficial UNi Xonar Drivers which offer benefits over the manufacturer drivers and are more lightweight.
Video Drivers with XP Support
 I previously wrote a tutorial on how to modify NVIDIA GeForce 9-Series drivers (GTX-960, GTX-970, GTX-980, GTX-980 TI, Titan X) to regain Windows XP support. Unfortunately, such a process is not so feasible with the 10-Series that run on the new Pascal architecture. While I haven't personally invested in a 10-Series card yet to experiment, it does not seem like anyone else has had success so far even using my original tutorial as a guide. NVIDIA staffers have confirmed that they don't even have any functional XP capabilities internally for the latest line of cards. NVIDIA also stopped updating the last surviving XP driver (for the GTX 960) in July of 2016. The recent series of AMD cards face similar barriers for XP.
If your motherboard has onboard video in the form of Intel HD 4000 or lower, you can download compatible drivers from Intel's website with the last XP-compatible release being v14.56.0.5449 (2014). You can find similar legacy drivers for onboard AMD video graphics at AMD's website. I haven't researched the aforementioned drivers to determine whether or not they could be modified to accommodate more recent onboard GPUs in a similar fashion to the NVIDIA drivers. It is possible to enable onboard video and have a dedicated PCI-e video card at the same time, although exact configuration and compatibility varies by BIOS and chipset. If running both (embedded for XP and dedicated for Windows 10) you will either have to use two inputs on your display or invest in an HDMI switch to toggle between display outputs.
A third option that is relatively similar to the one above would be to have two dedicated video cards installed in your computer, with outputs from each going to your monitor or through a switch to toggle between them. In this manner, one could have for instance a Geforce GTX-960 as a secondary card with drivers installed in XP, and a GTX-1080 with drivers installed in Windows 10. This is a somewhat clunky approach but one that could be considered if all else fails with your primary card.
Network Drivers with XP Support
Ethernet drivers compatible with Windows XP are generally easier to find than other sets, but again it varies by motherboard and newer ones still can prove a challenge. You will want to begin by searching the motherboard's website for drivers; even if a motherboard doesn't offer major drivers for XP, they may still supply XP-compatible drivers for the onboard Ethernet controllers.
If the motherboard manufacturer does not offer XP-compatible Ethernet drivers, the next step is to review the actual Ethernet chipset through the motherboard specs, physical chipset labeling or hadware ID from Device Manager. From there you can check the chipset manufacturer's site directly. In some instances an Ethernet chipsets are essentially just rebranded versions of others that do have XP driver support. Generally, you will get leads if you search the hardware device ID or on Google and see what variety of names come up.
 On the Z97, the "Killer E2200 Gigabit Ethernet" controller has no XP-compatible drivers. However, its actual chipset is derived from the "Qualcomm/Atheros AR8161" chip and Atheros does offer Windows XP drivers. Since these have different branding, you will need to update the Ethernet via Device Manager in Windows XP, by browsing to the extracted drivers just downloaded.
If you instead use a USB WiFi adapter, you'll typically be able to find XP-compatible drivers for it on the manufacturer's website even if you have to search back several versions. I have a Netgear A6200 and was able to find Windows XP-compatible drivers on the official website. Of course, before the USB adapter will work, you will first need to get the USB ports themselves working.
USB Ports with Windows XP Drivers
 Integrated USB ports on modern machines can be complicated in Windows XP as well. Namely because USB 3.0 ports built on Intel architecture is categorically unsupported (Intel instead recommends setting xHCI Mode in BIOS to Auto/Smart Auto to mimic USB 2.0 functionality using default Windows drivers). Other motherboards that use AMD architecture may have better luck with chipset drivers. Usually your motherboard will still have at least a couple USB 2.0 ports in the back (and most cases have some USB 2.0 ports on the front as well). These ports are more likely to be picked up and usable in Windows XP without any added drivers, including for your keyboard and mouse.
To alleviate the struggle in cases of difficult motherboards, consider purchasing a USB 2.0 or USB 3.0 expansion port that is compatible with XP. The allows optional expansion to a front panel and 5 dedicated USB 3.0 channels, plus it has Windows XP supported drivers. When using these ports in Windows XP the speeds will be restricted to USB 2.0 (the norm for any functional USB 3.0 port in Windows XP). I have a second two port USB 3.0 expansion card (Syba SD-PEX20139) that likewise provides Windows XP support. By using these ports for peripherals that you wish to share between XP and Windows 10, you can ensure they will function perfectly in each and at USB 3.0 speeds in Windows 10 and USB 2.0 speeds in Windows XP. If you use one of these cards to also power a front panel USB component, those ports will likewise behave as intended across both operating systems.
Extended Windows XP Security Updates
Even if you slipstreamed service pack 3 and subsequent updates into your custom installer, I recommend that you run Windows Update on XP after connecting to the Internet and downloading any lingering patches. In addition, a small Registry update can help spoof the update system into providing additional updates even beyond the 2014 "end of life" cycle for Windows XP. To apply the update, open Regedit in Windows XP and then:
- Navigate to HKEY_LOCAL_MACHINE → SYSTEM → WPA.
- Right-click on the WPA folder in the left navigation panel and then select New → Key.
- Name the newly created key: PosReady
- Right-click on the PosReady key and then select New → DWORD.
- Name the new DWORD: Installed
- Double-click the new DWORD and then set the Value Data to: 1 (Decimal)
- Restart your computer and boot into Windows XP again.
- After leaving the compute idle but connected to the Internet for at least several minutes, run a Windows Update scan again.
Using this approach, you may find additional security patches and updates when that can be downloaded and installed. Alternatively, there are some sources that provide download links and bundles containing the additional updates for inclusion within the slipstreamed install, such as RyanVM.
Conclusion
![]() I was initially reluctant to write this guide considering the seeming obscurity of its practical use in 2018. However, my tutorial on getting modern NVIDIA cards to cooperate with XP has consistently been one of the top five most frequented and discussed posts on this website. The former XP-related article is routinely referenced by other communities whenever someone raises the question about getting their modern hardware to work on the now-archaic XP operating system. This suggests that there are still enough enthusiasts or "XP purists" to find some value in creating this detailed start-to-finish guide on dual booting between the platforms.
I was initially reluctant to write this guide considering the seeming obscurity of its practical use in 2018. However, my tutorial on getting modern NVIDIA cards to cooperate with XP has consistently been one of the top five most frequented and discussed posts on this website. The former XP-related article is routinely referenced by other communities whenever someone raises the question about getting their modern hardware to work on the now-archaic XP operating system. This suggests that there are still enough enthusiasts or "XP purists" to find some value in creating this detailed start-to-finish guide on dual booting between the platforms.
As hardware continues to evolve, maintaining a perfectly functional Windows XP install will become increasingly challenging. My suggestion to all would be to first consider virtualization for Windows XP functionality (e.g., via VirtualBox or VMWare) to verify whether or not a dedicated install is actually needed. For a lot of applications and uses, running XP as a guest machine from within Windows 10 is perfectly adequate. However for XP-based applications or peripherals that depend more strictly on physical hardware emulation might not cut it at which point this guide can serve as a solid foundation for getting a dual-boot system up-and-running.
This article depicts one path toward the ultimate objective. It is a well-tested and fairly consistent approach that I personally evolved through years of completing this same process using many different methods. Alternate paths that I've explored over time have included: Using separate hard drives for each operating system; installing Windows XP after the modern operating system has been installed; creating a bootable USB with a complete XP install; and using legacy-based BIOS settings including disabling AHCI for added XP compatibility. I slowly grew to adopt the current method as my preferred choice to avoid many pitfalls and drawbacks of the above-mentioned alternatives.
Great program thanks to the geniuses who figured this out. I bought a refill kit and after market ink cartridges but later made the fatal mistake of clicking on Epson update. Third rail. Got everything working now & reinstalled my wireless el cheapo XP-430 which works perfectly with the replacement cartridges all of which show full ink levels. You guys saved me a ton of money now that I don't need to buy either a new printer or over-priced ink jet cartridges.
The best article ever regarding this topic. Everything is explained properly so that I have no doubt about the process. Thank you million times for sharing your knowledge.
Thanks for a very well written article. There are a few things worth mentiong: changing from ACHI to ATA may be necessary in BIOS, as well as pressing F7 during XP installation for non-ACHI compatible motherboards. When running XP, I was stuck in drivers hell, couldn't manage my Gefore GT-650M to run propely despite have installed the latest drivers for XP. I had to give up on this, unfortunately.
Absolutely brilliant article. I finally succeeded in installing XP & Windows 10 on my old Dell E6400 and it is running fine now.
Another big help was Rufus, a very light and free program to make a bootable USB stick or CD/DVD, it has a setting for older BIOSes as well.
Many thanks.
Great article indeed. We had a special case of a customer that needed native Windows XP (not virtualized) and of course Windows 10 in his laptop, so we used your steps to achieve the goal. Thanks.
Matt,
Simply put, you are a guru genius who has gone above and beyond any previous explanations on this topic.
I have done things much the same as in this tutorial over the years aside from successfully finding the drivers for some onboard peripherals and configuring AHCI mode properly for my Alienware 17 (R2) laptop. I will keep trying!
Love the XP/WIN10 wallpaper by the way!
Hi Matt, So I've recently purchased an older Alienware 17 (R1) model laptop and decided to part with the newer (R2) as I could not seem to load the AHCI drivers for Win XP. The R1 version has true AHCI drivers that I've downloaded from DriverPack Solutions online. However, I can't seem to load them properly when doing my install. (I have the BIOS mode set correctly and I am choosing the right driver from the txtsetup.oem summary to my knowledge. All the files are in the root directory of the floppy disk and the files seem to load until I get stopped at the bsod. I also tried to install from a slipstreamed cd I made with nlite with no luck. Am I missing something?
Please help if possible..
Thanks.
J.
...So I went ahead and took my system to a reputable computer shop to have this looked at. They came back saying that after successfully finding custom AHCI drivers online they were still unable to load them correctly due to not having the exact hardware ID (DEV_8C3A) This is for the intel chipset. Its beyond me to try finding this online somewhere which the tech guy says does exist somewhere but they couldn't spend anymore time trying to find it. Is there any hope to solving this for me? I really would like to avoid having to use XP in a Virtual machine.
Dual boot windows xp installation succes full
USB 2.0 and SATA support is included in Windows XP SP 1a long ago. Intel AHCI installing using the floppy drive worked on an old Dell desktop. I gave up on my Dell PE server - only ATA & RAID - no AHCI is no big deal is what I read.
I had an issue with the original 2005 installed Windows XP and Windows 10 (on a newer much larger drive) appearing in a Boot Menu; instead it just booted to Windows 10. An XP CD can be used to restore Windows XP boot but it Repairs Windows to the Service Pack of the CD so watch out. Then used the Windows 10 DVD to get dual boot back. I would try the steps HERE instead next time.
Driver woes - my OLD Creative audio card has no Windows 10 drivers from Creative and will BSOD a new Windows 10 shortly in fact! Solution is to install kxProject drivers immediately - yeah kxProject.
I forgot how FAST Windows XP was before adding the massive security to safely connect to the internet so I simply uninstalled the network device.
Meh. I would rather use Windows XP than Windows 10 anyhow. Thank you for taking the time to write this.
True about what ian said
Pingback: Dual Booting Windows 11 and Windows XP in 2021: A Retrospective | Matt's Repository
Thank you so much,
Why Microsoft OS RAM usage increased each release and increase the hardware cost.
Windows-XP and Windows-7 is working with 512MB of RAM
But Windows-10 is very slow in 2GB and good in 4GB.
Now, windows-11 looks like 8GB of RAM recommanded.
Thanks for detailed instructions. May save my PC locked on Windows Xp after dual boot attempt. Cannot get back to Windows 10.
Side note, since Windows 1o dropped IEEE 1394 support I cannot use that type of video record card. Tried Win 7 and Windows Xp without success. Maybe you have experience in that.
Thanks again.